Your automation flow can include multiple emails that will be automatically sent to contacts who fulfill the sequence conditions.
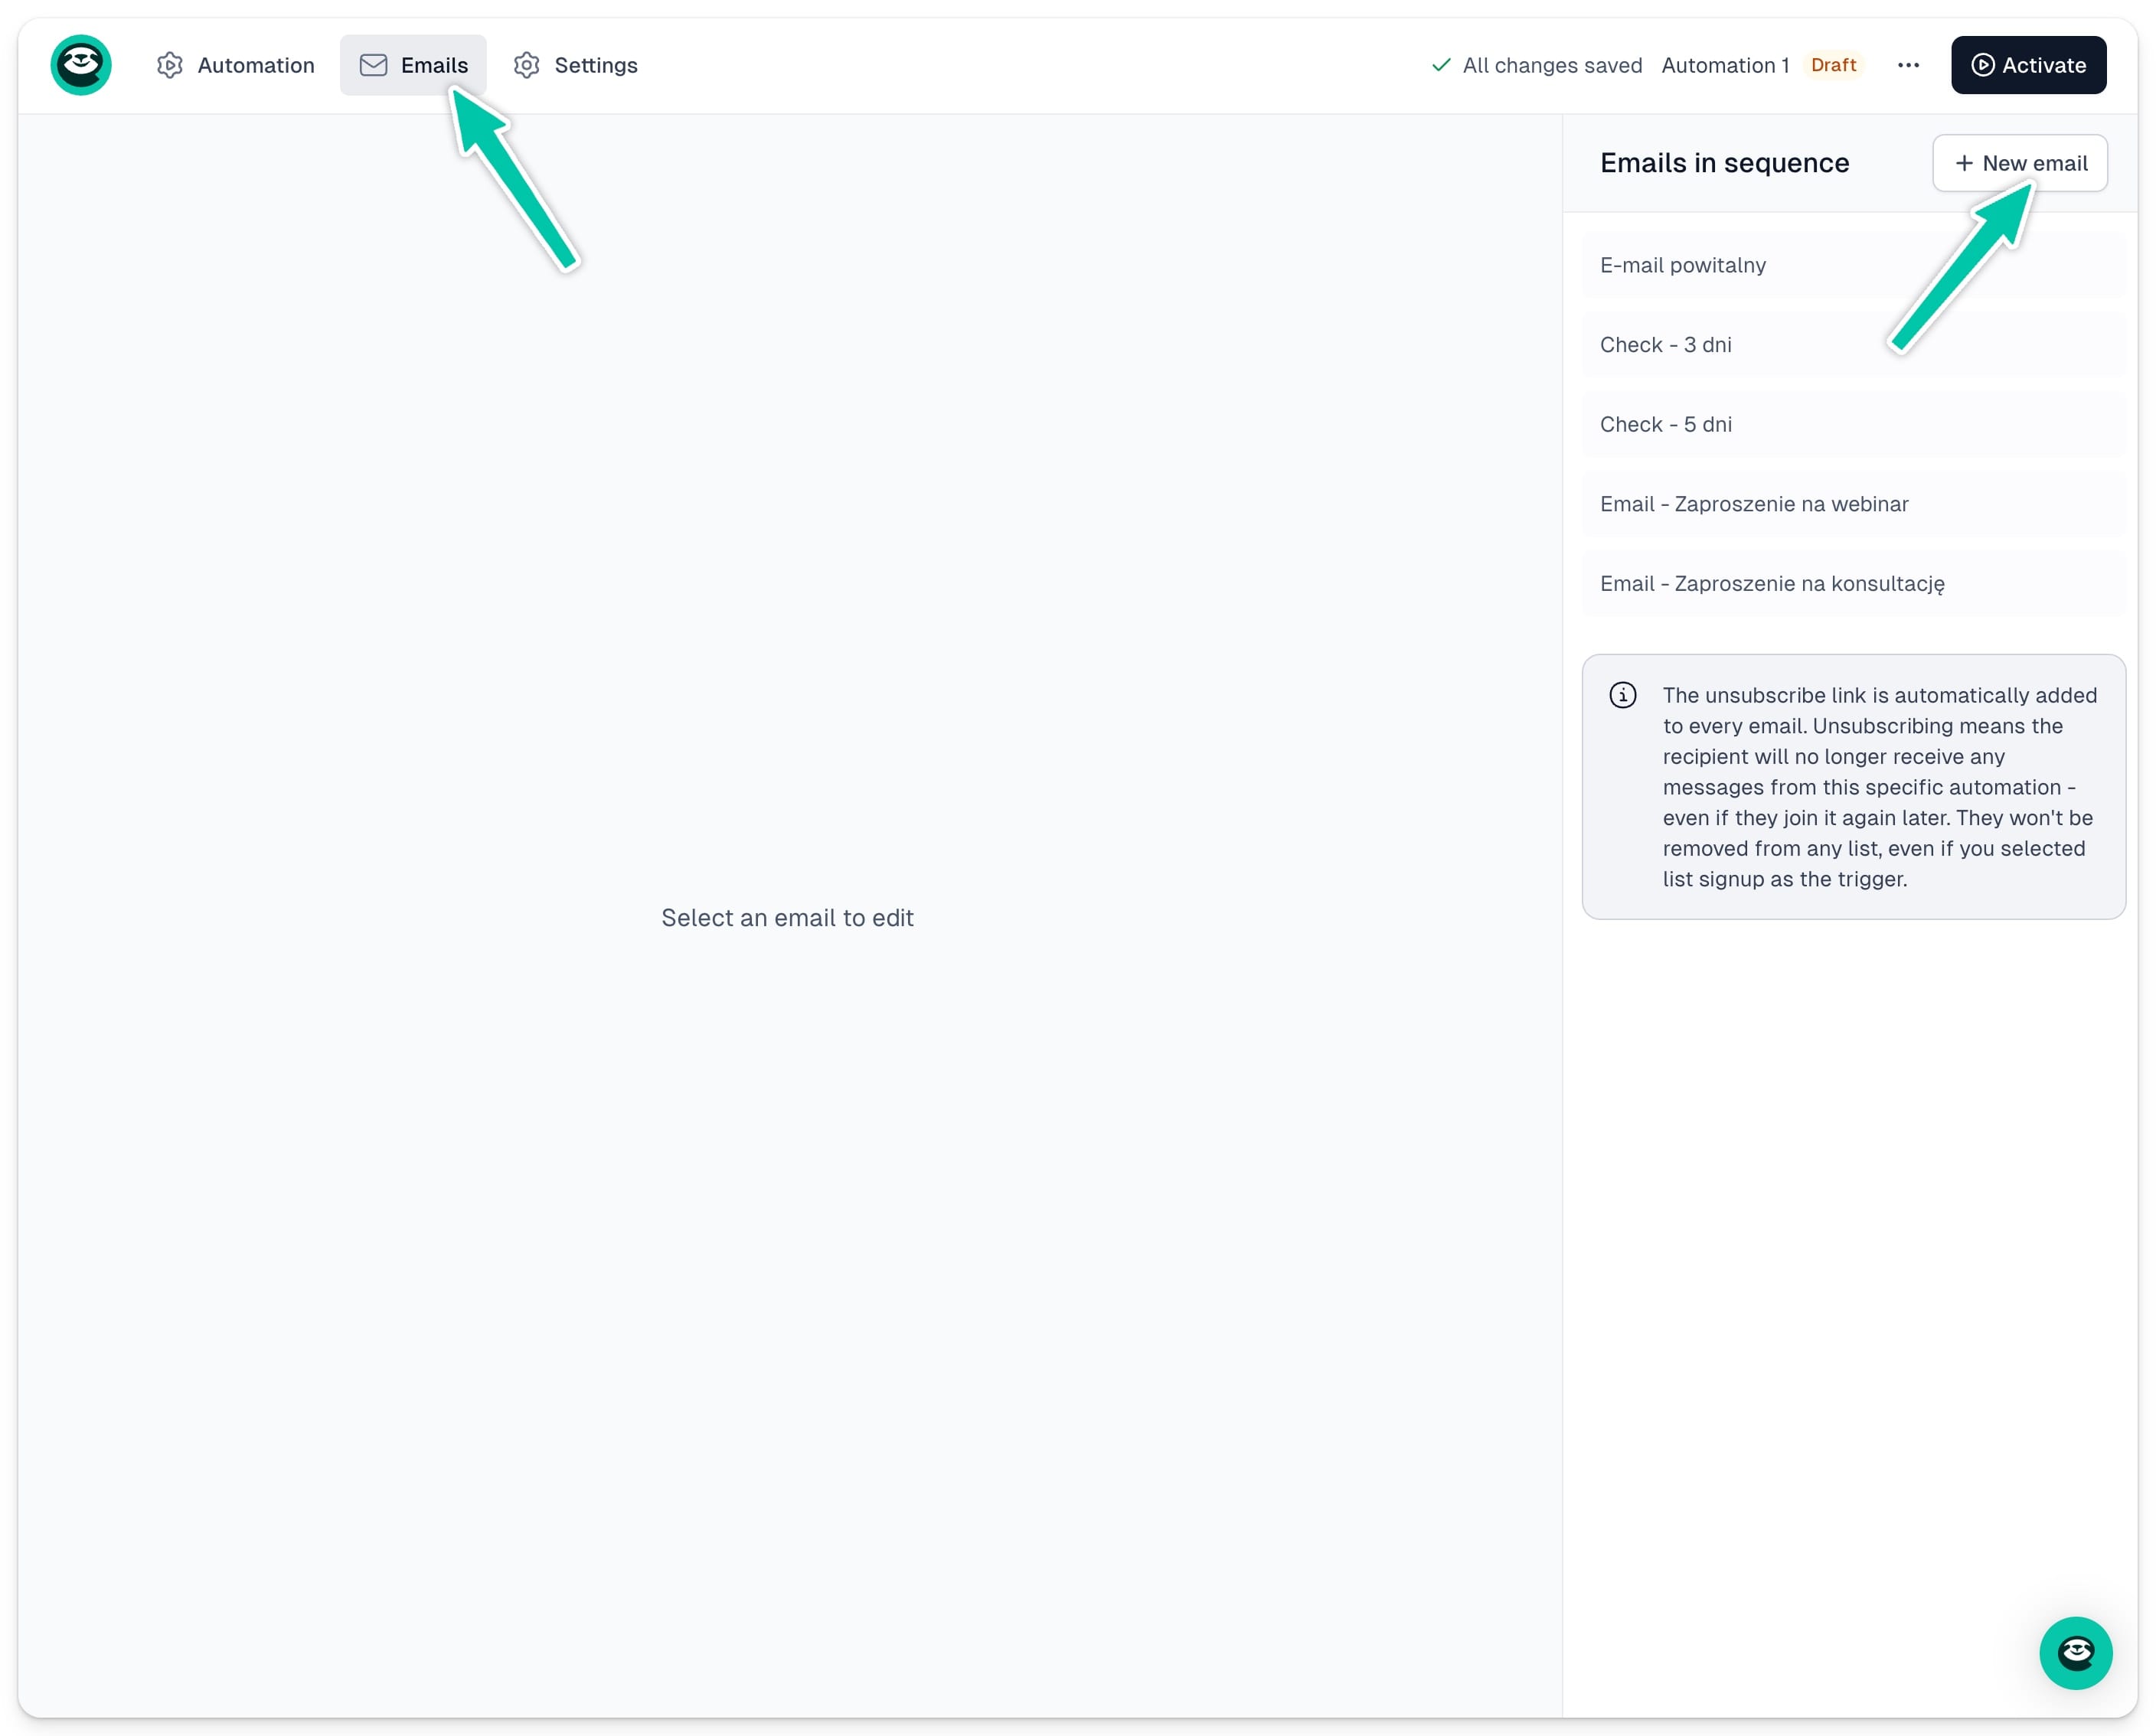
All emails you add to your flow are stored in a dedicated tab. To access it, open your workflow editor and click Emails in the top menu.
You can add and edit emails here before you start building your flow, or add them on the go while defining your sequence steps.
Adding a new email
You have two options for adding a new email to your sequence. The first option is to add an email while configuring your automation actions. To do this:
- Click + to add a new step to your sequence
- Select Send email as the action
- In the left-hand menu click + Create new
- Enter the email name
- Build your email in the editor
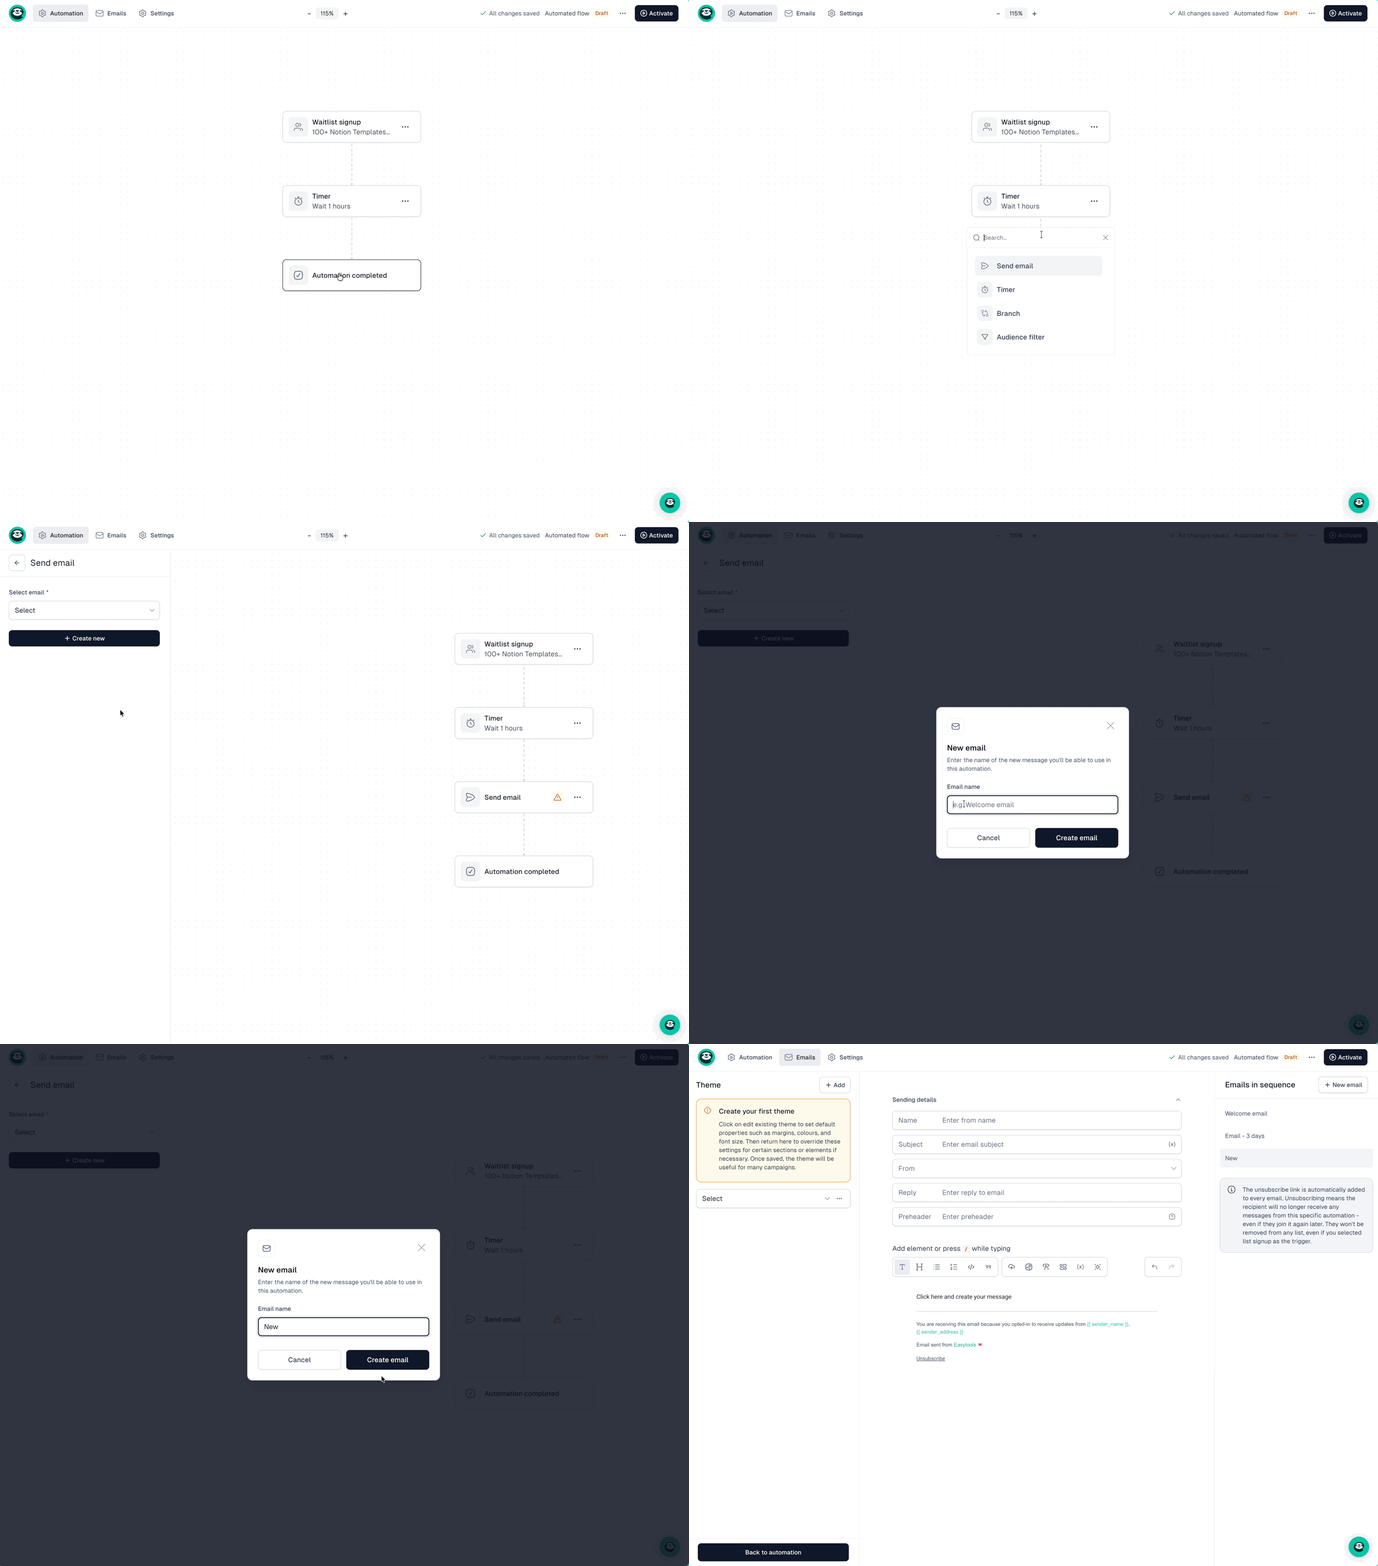
The second option is to create an email directly in the Emails tab. To do this:
- Open your workflow editor and click the Emails tab in the top menu
- Click + New email in the top right corner
- Set an internal name for your email and click Create email
- You will be taken to the email editor where you can configure and build your email
Configuring your email
Before editing the content, set up the following details:
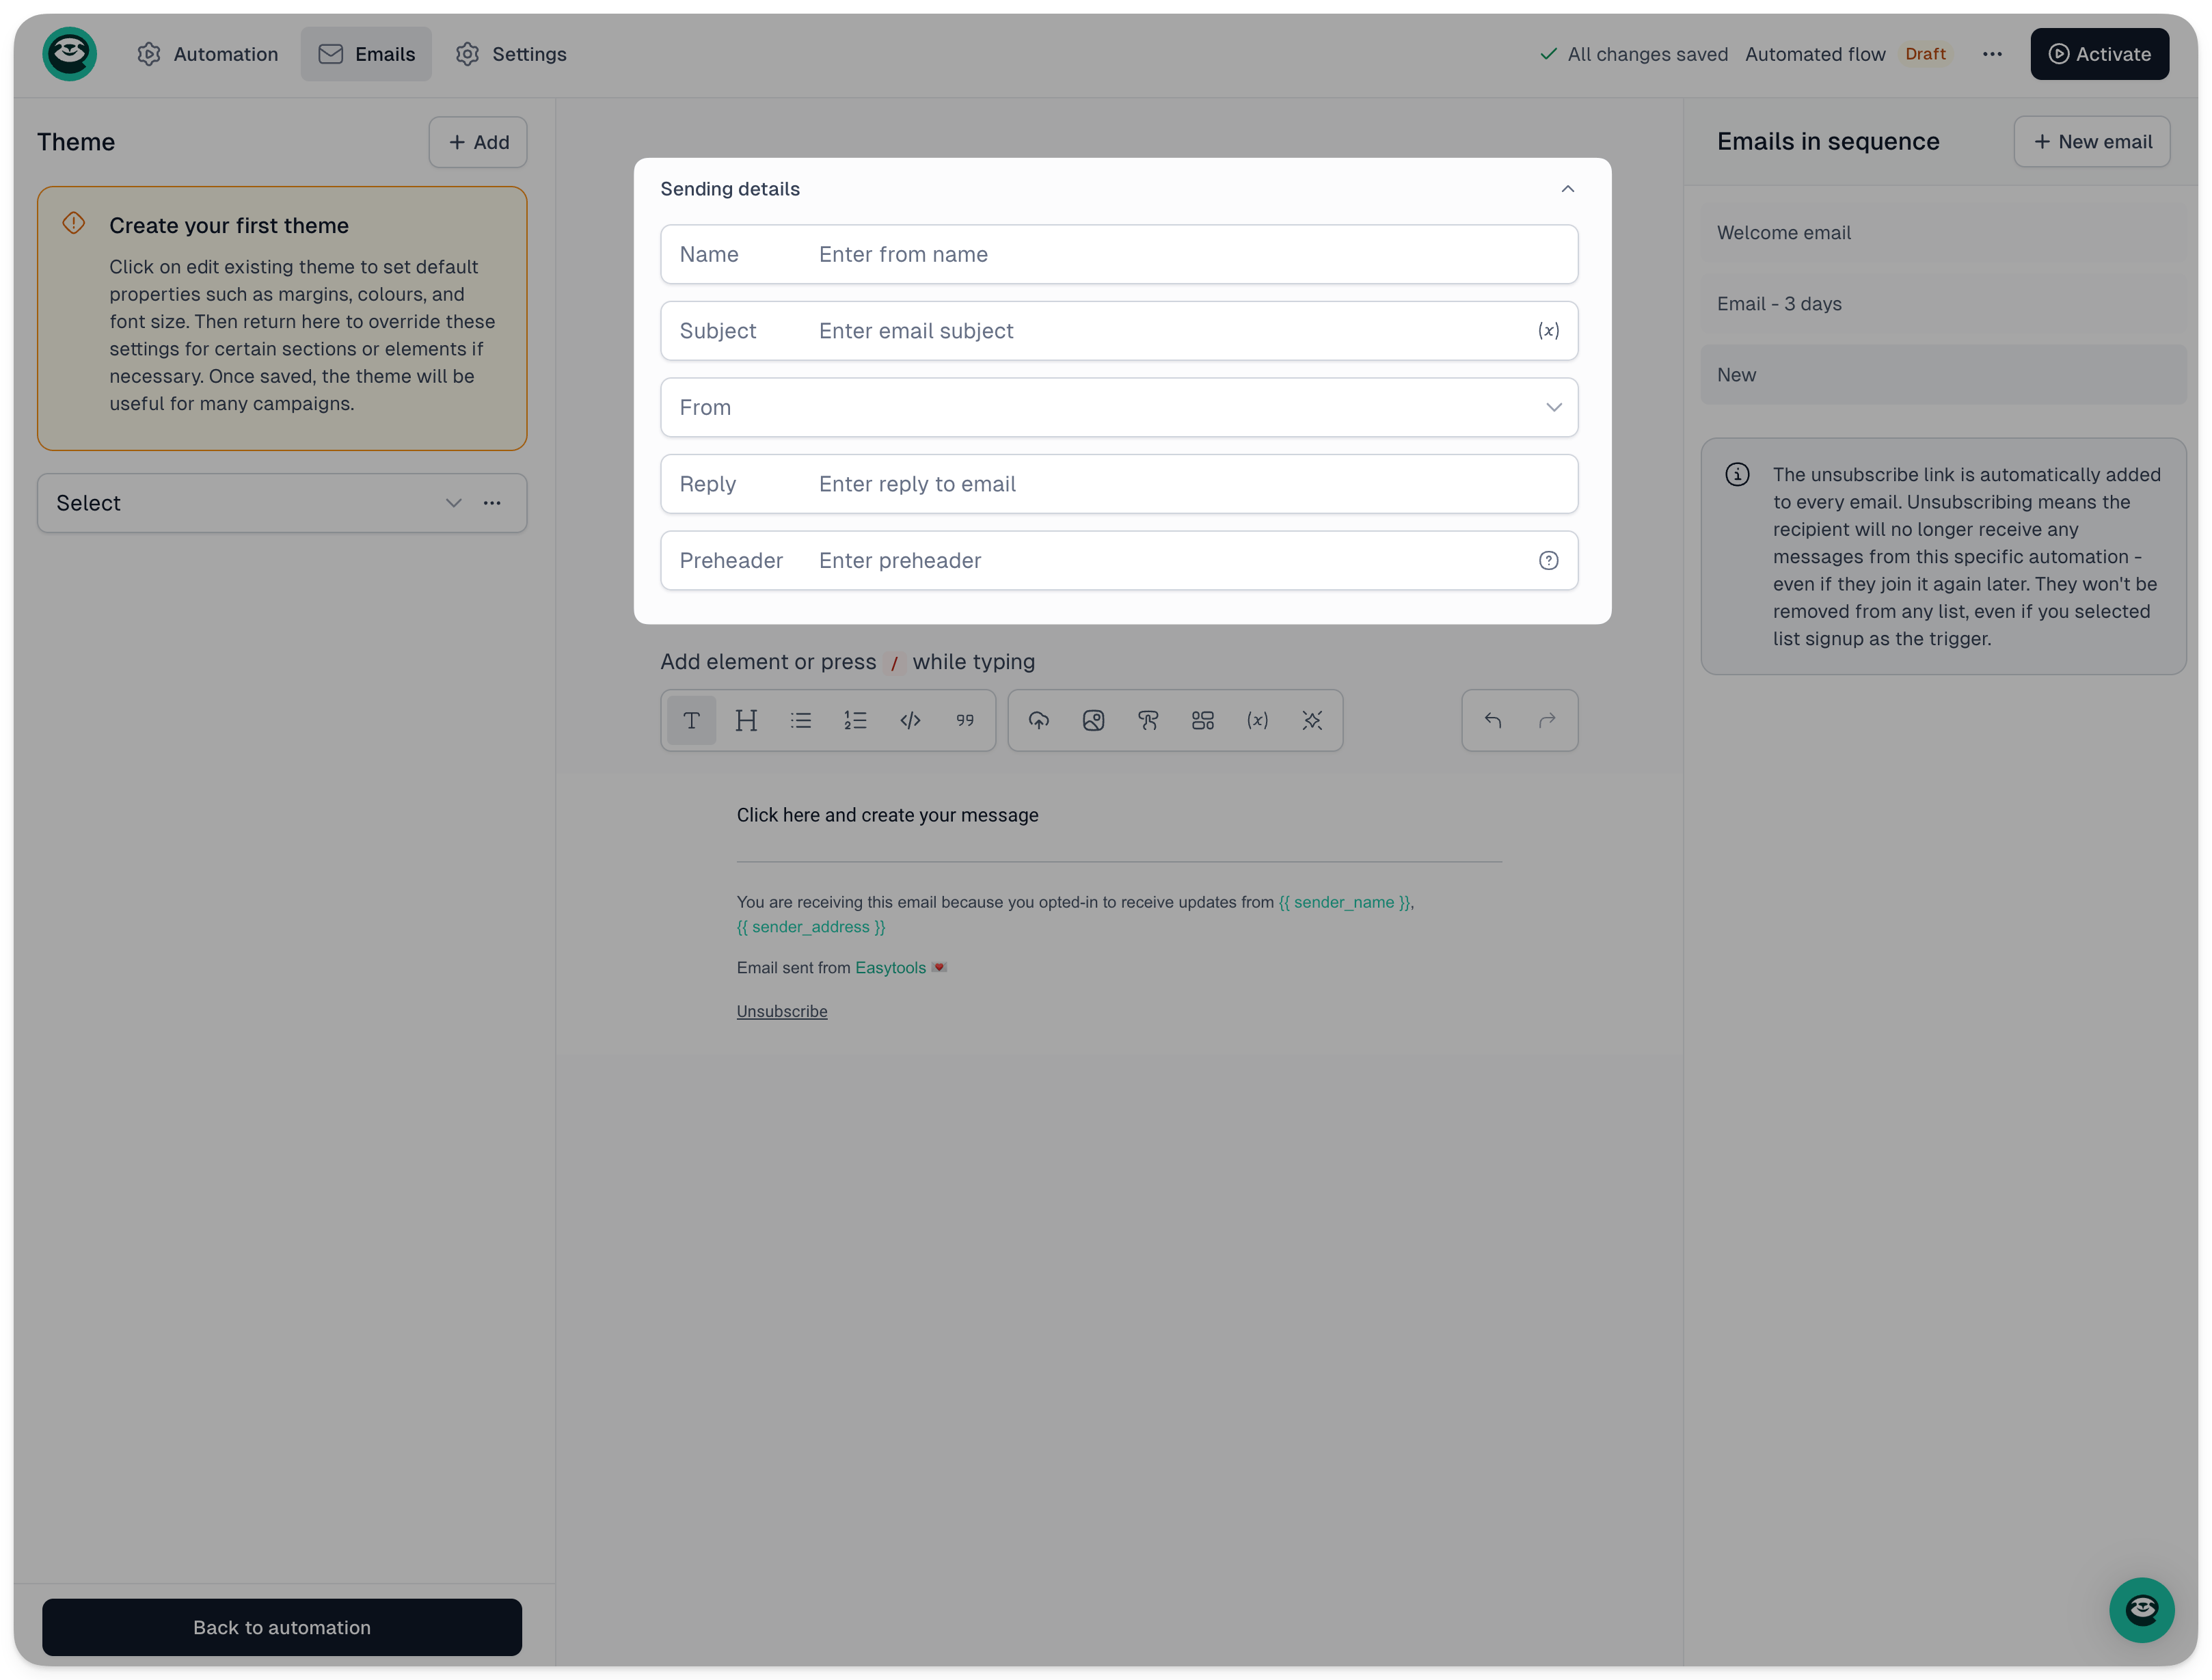
- Name - internal name used to identify this email in your flow
- Subject - the email subject line, which can include variables
- From - the sender email address. Choose from your existing senders or click + New sender to add a new one
- Reply-to - the email address your contacts will reply to
- Preheader - a short text that appears beneath the subject line in most email clients, giving readers a brief preview of the email contents
Once the details are set, you can move on to building your email content. See the article about [building emails] for details.
When your email is ready, click + New email to add another message, or click Back to automation to return to your workflow editor.

You can add as many emails as you need - just make sure each one has a clear internal name so it’s easy to identify when building your sequence steps.
Important: Every automation email automatically includes an unsubscribe link. If a contact unsubscribes, they will no longer receive any messages from this specific automation - even if they join it again later. They will not be removed from any list, even if list signup was set as the trigger.