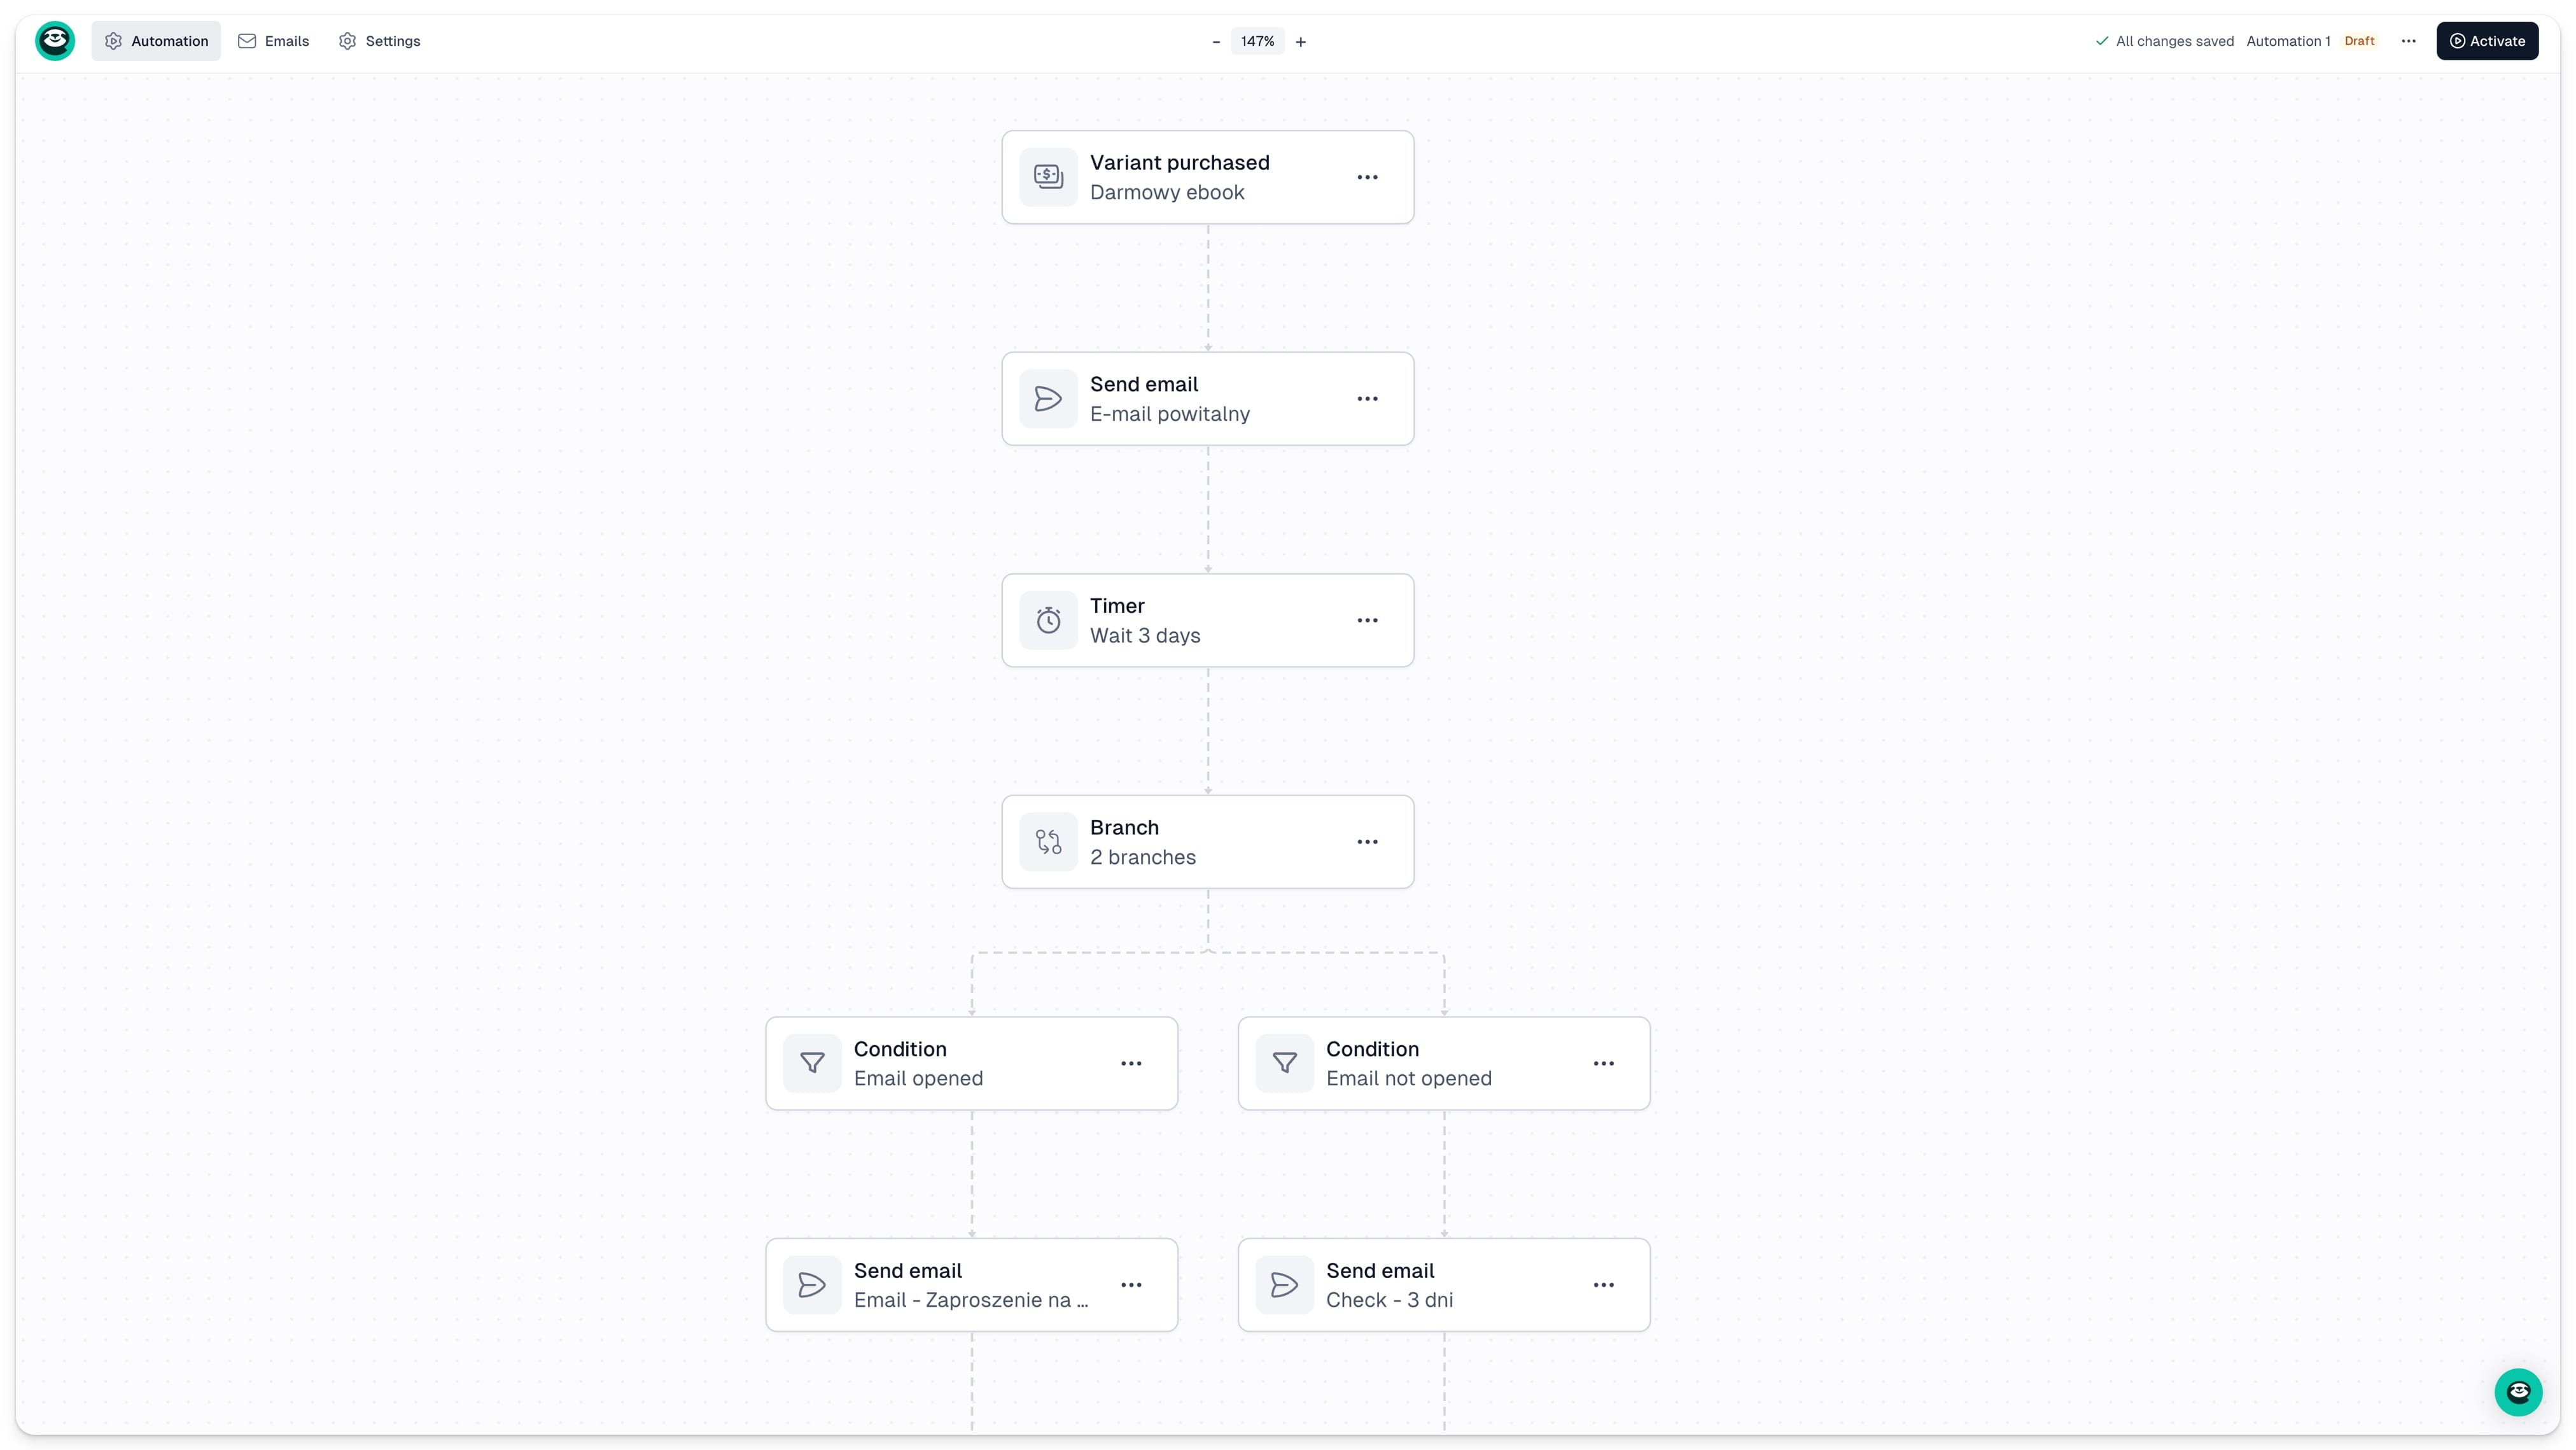
An automation sequence is or workflow made up of emails, conditions, branches, and filters that runs automatically once a contact meets a specific condition.
To get started with your automated workflow, open your Sellers panel and go to Campaigns → Automations in the left sidebar. This is where all your automation flows live, each showing its current status: Draft, Active, or Paused.
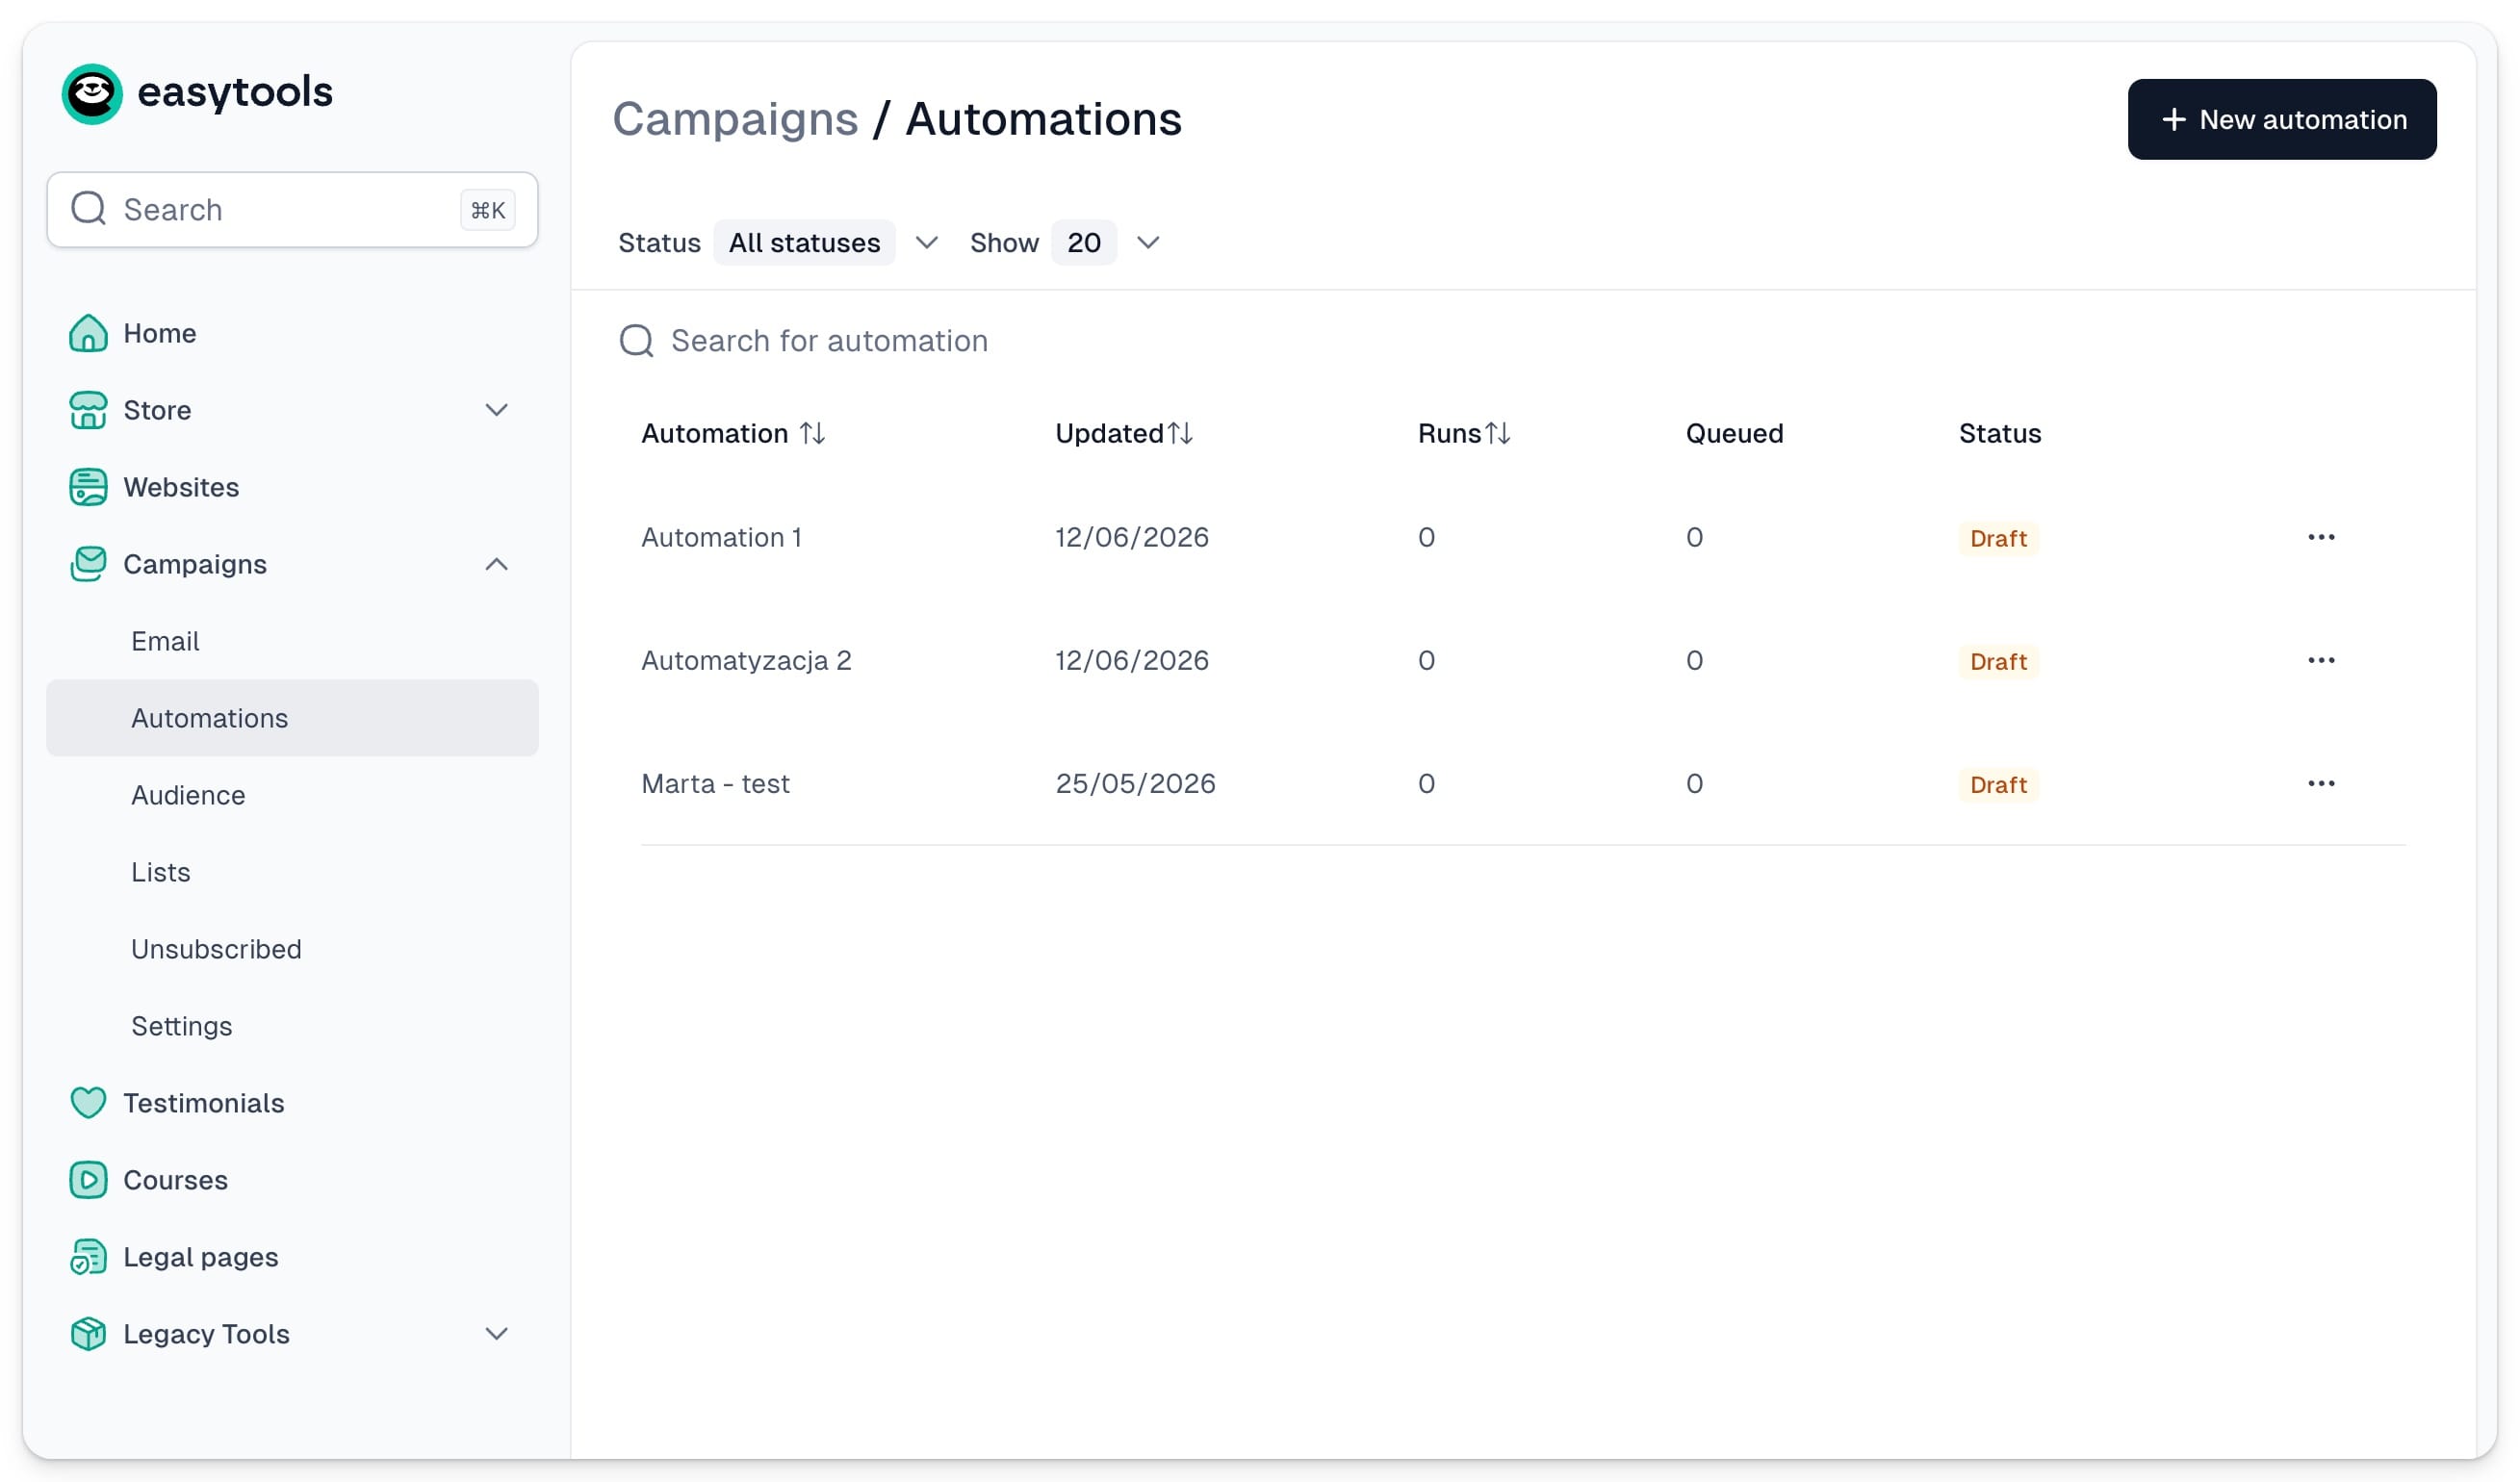
To create a new flow, click + New automation in the top right corner, give it a name, and you’re ready to start building.
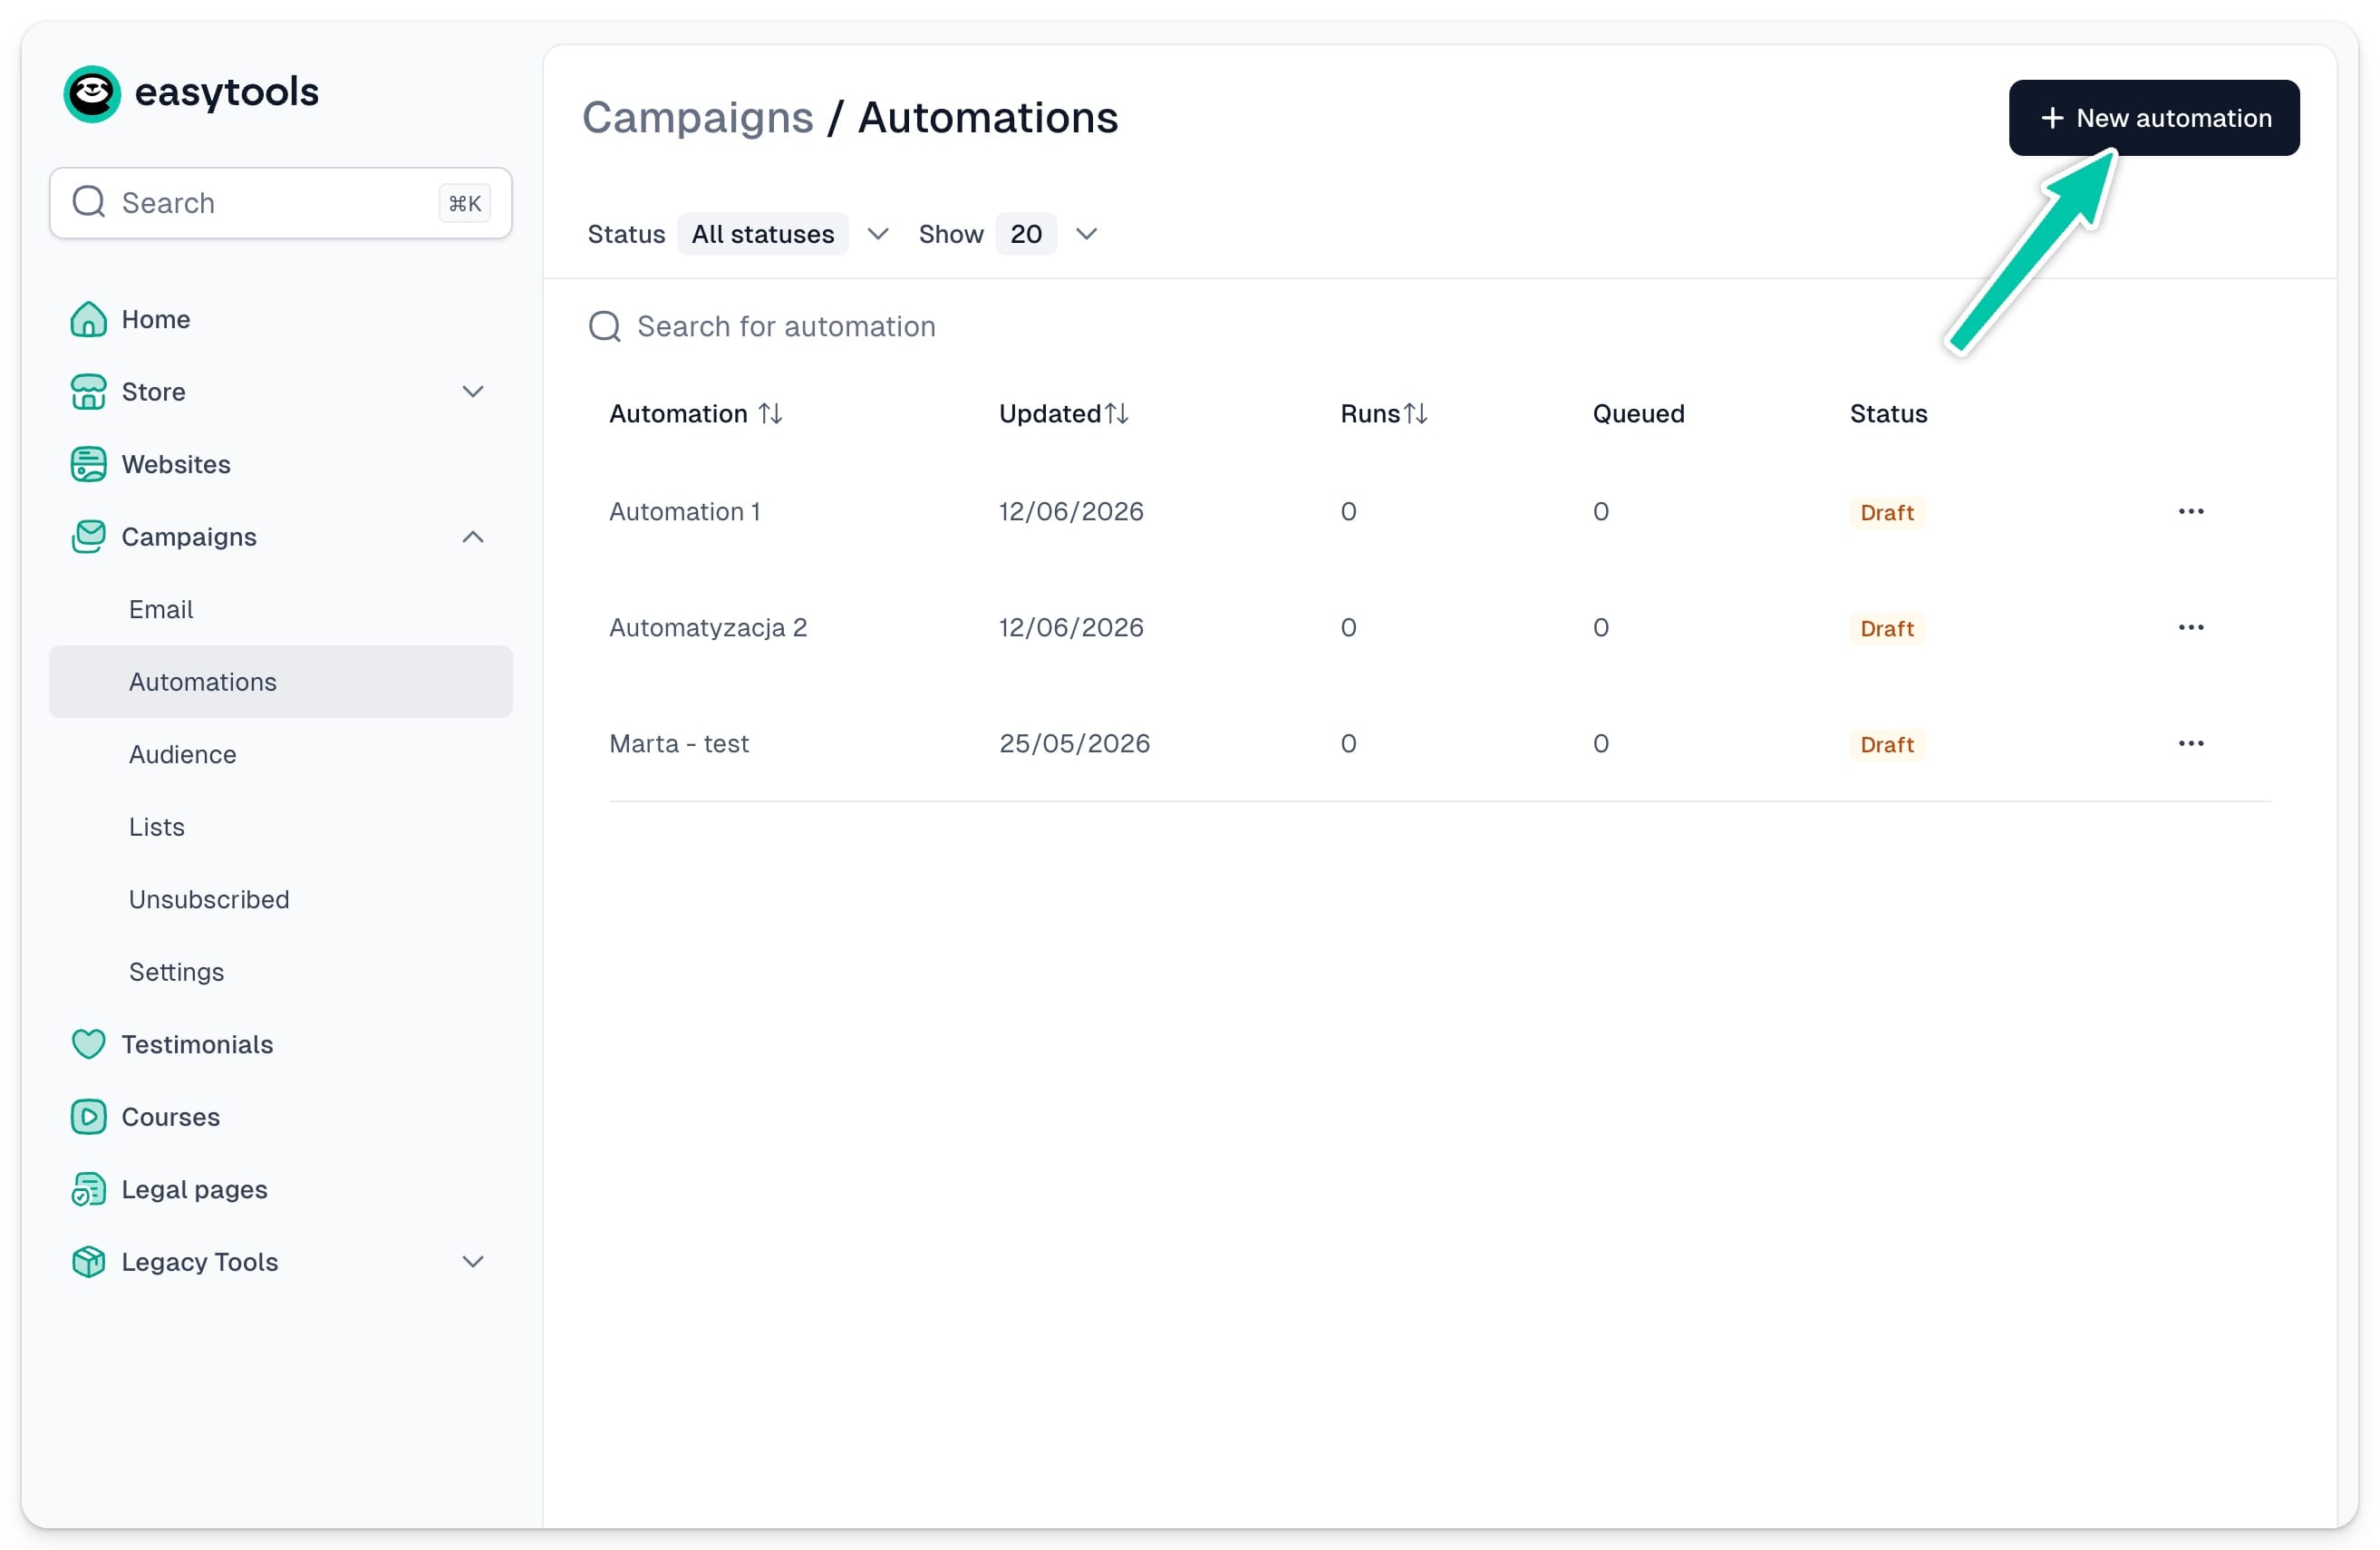
Setting your trigger
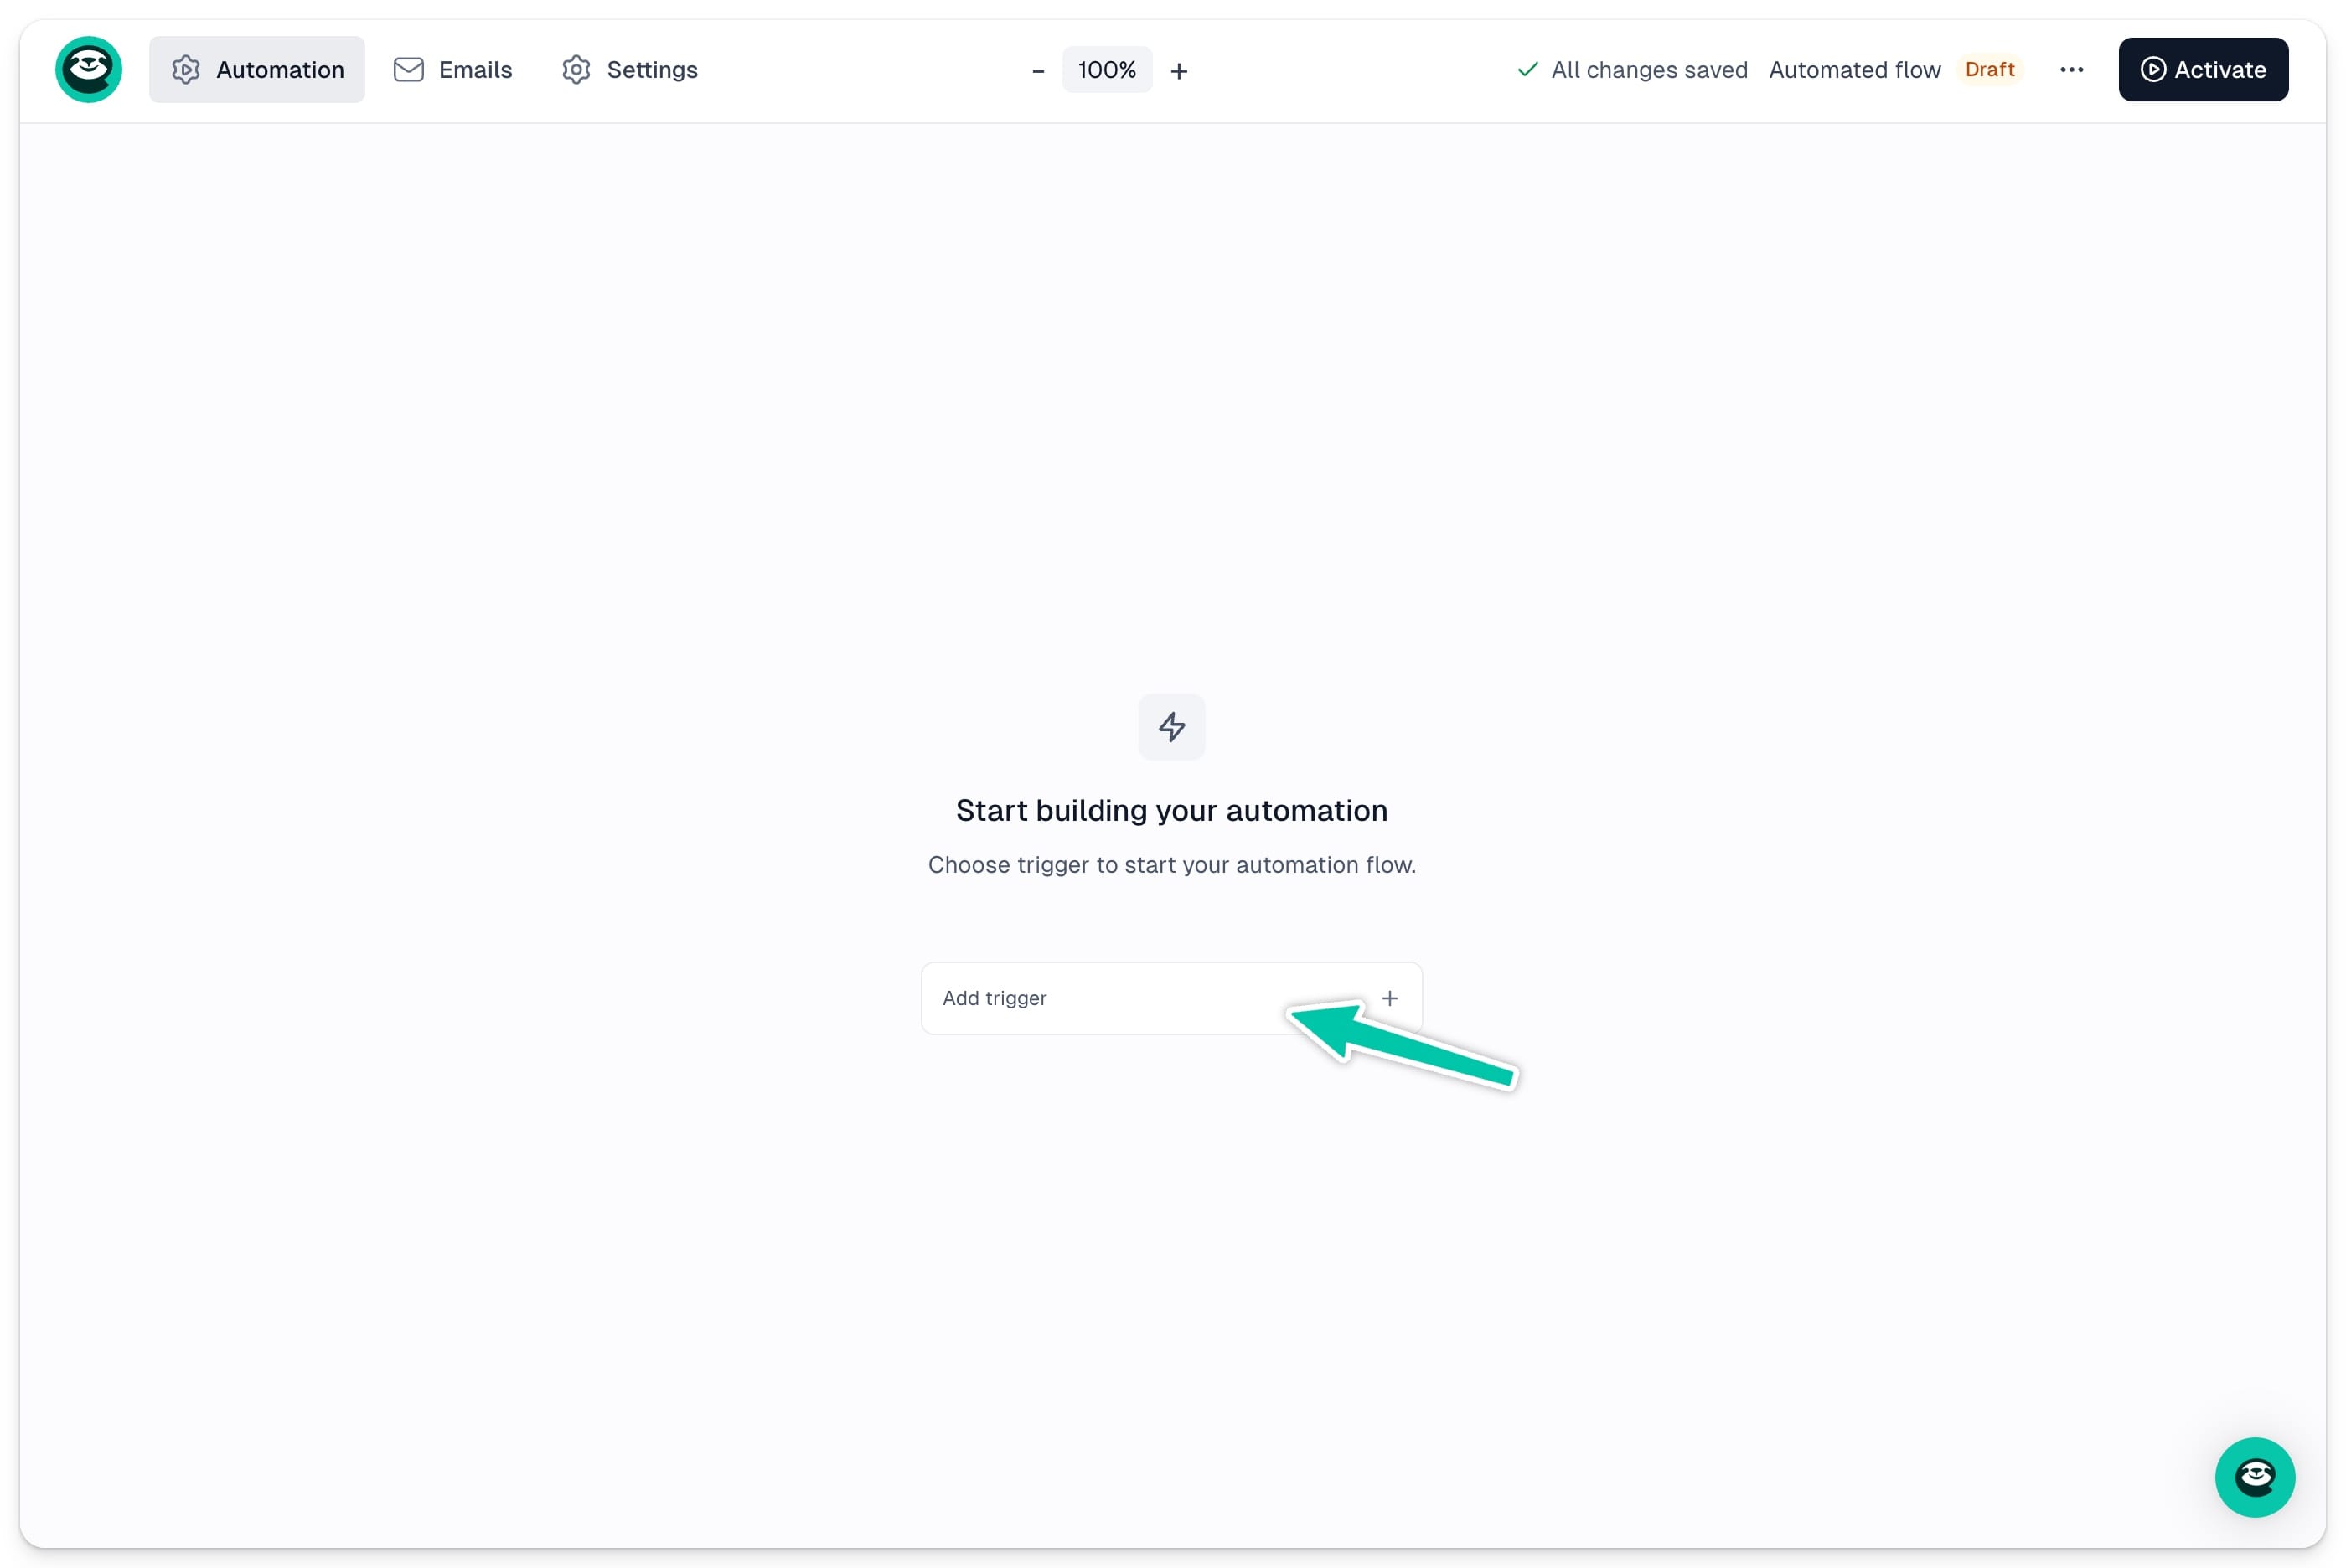
Every automation starts with a trigger - the event that sets the whole sequence in motion. Click the Add trigger + button in the middle of the screen and choose from the list of predefined events, for example: Contact added to list.
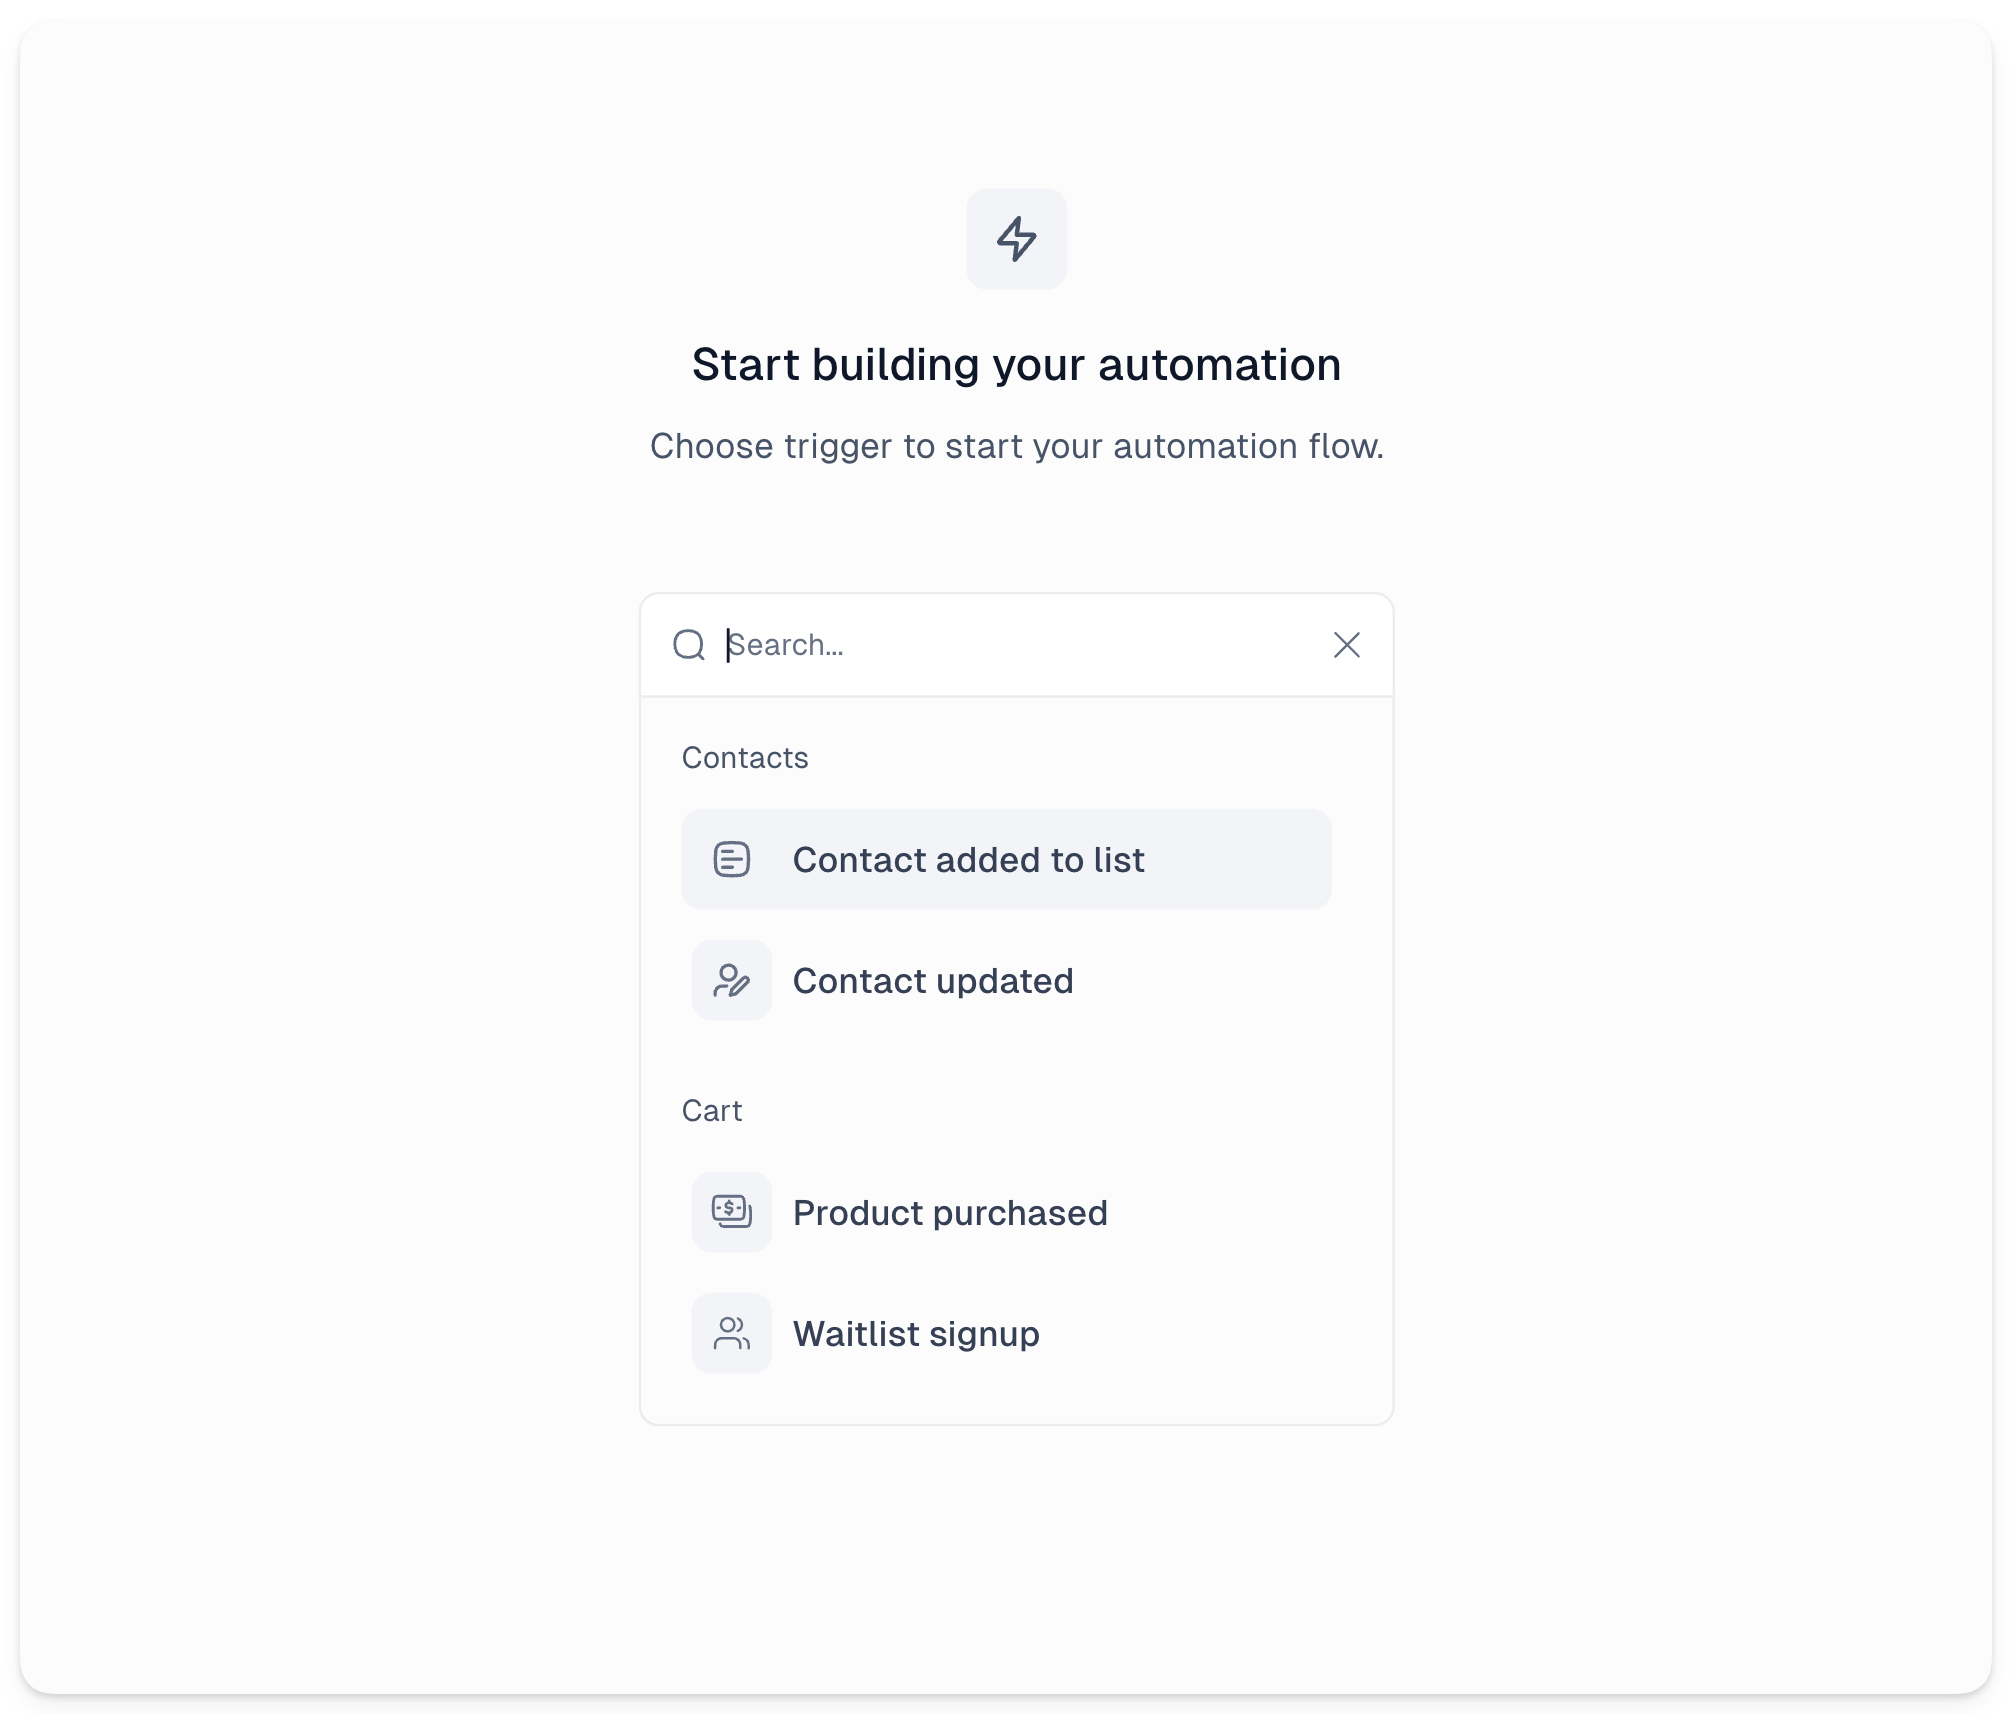
Once selected, you can fine-tune the trigger details in the left sidebar. Learn more about triggers.
Adding steps
Once your trigger is set, click the + button below it to start adding steps to your workflow.
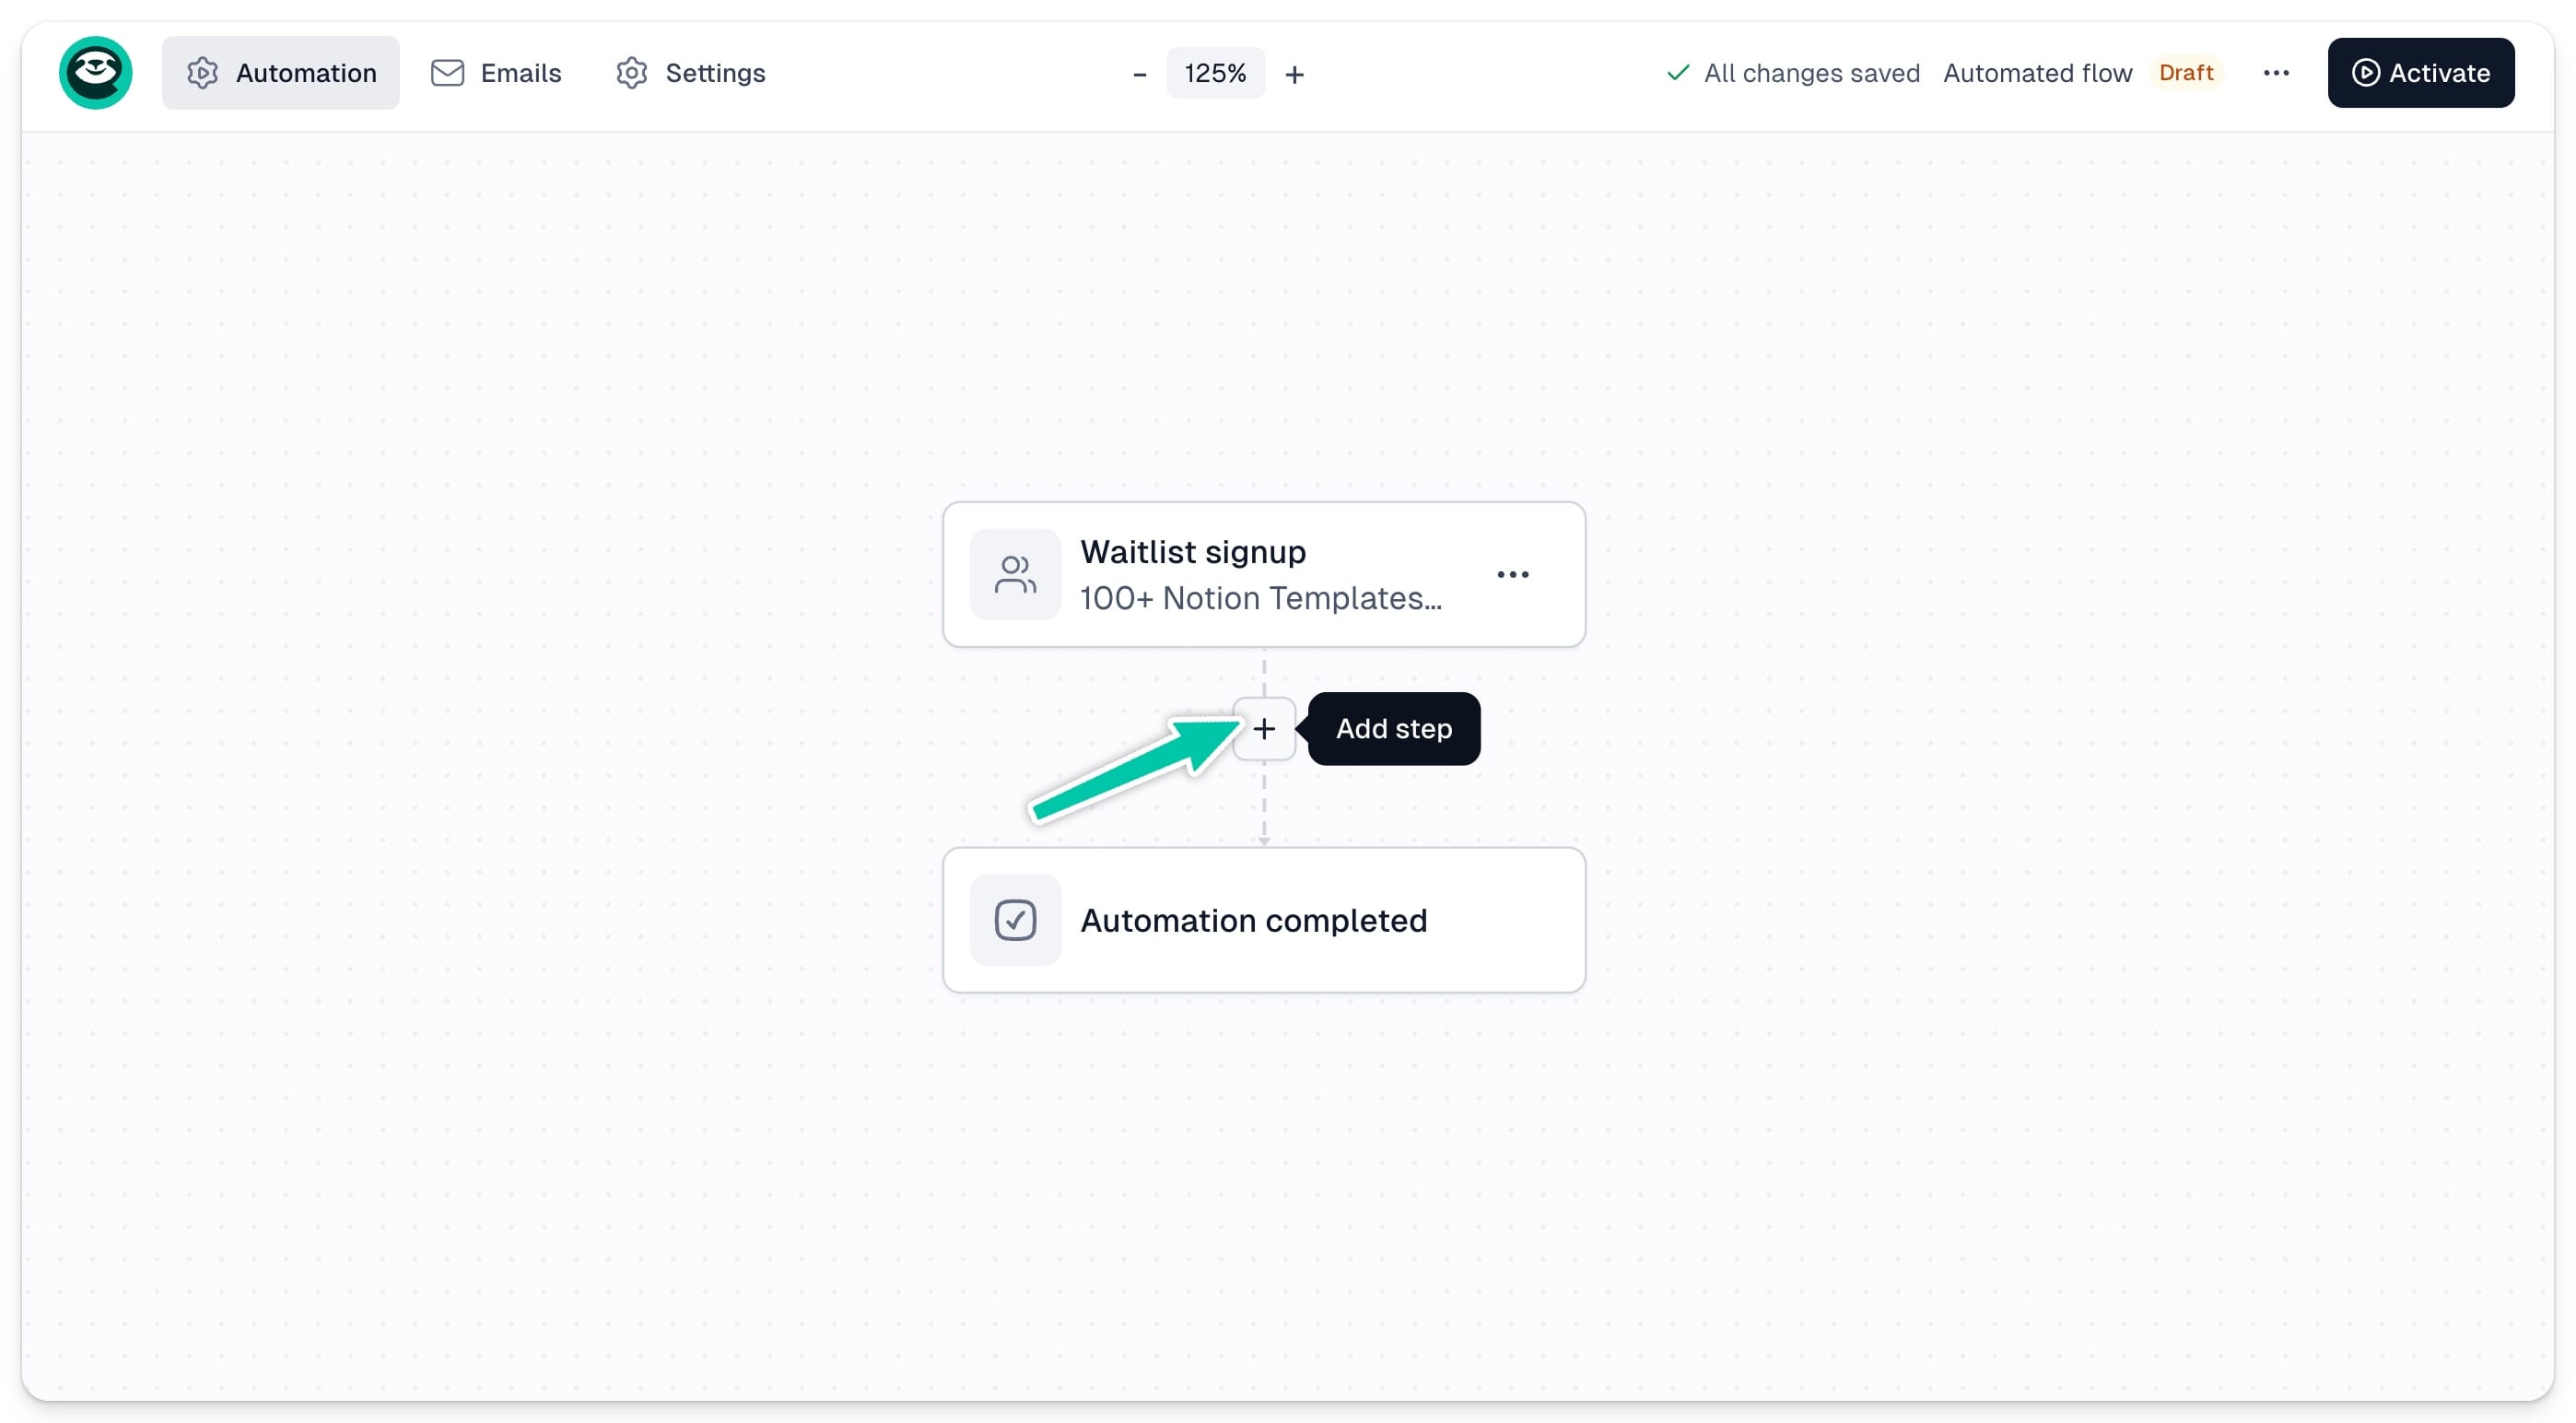
Each step is one of four action types:
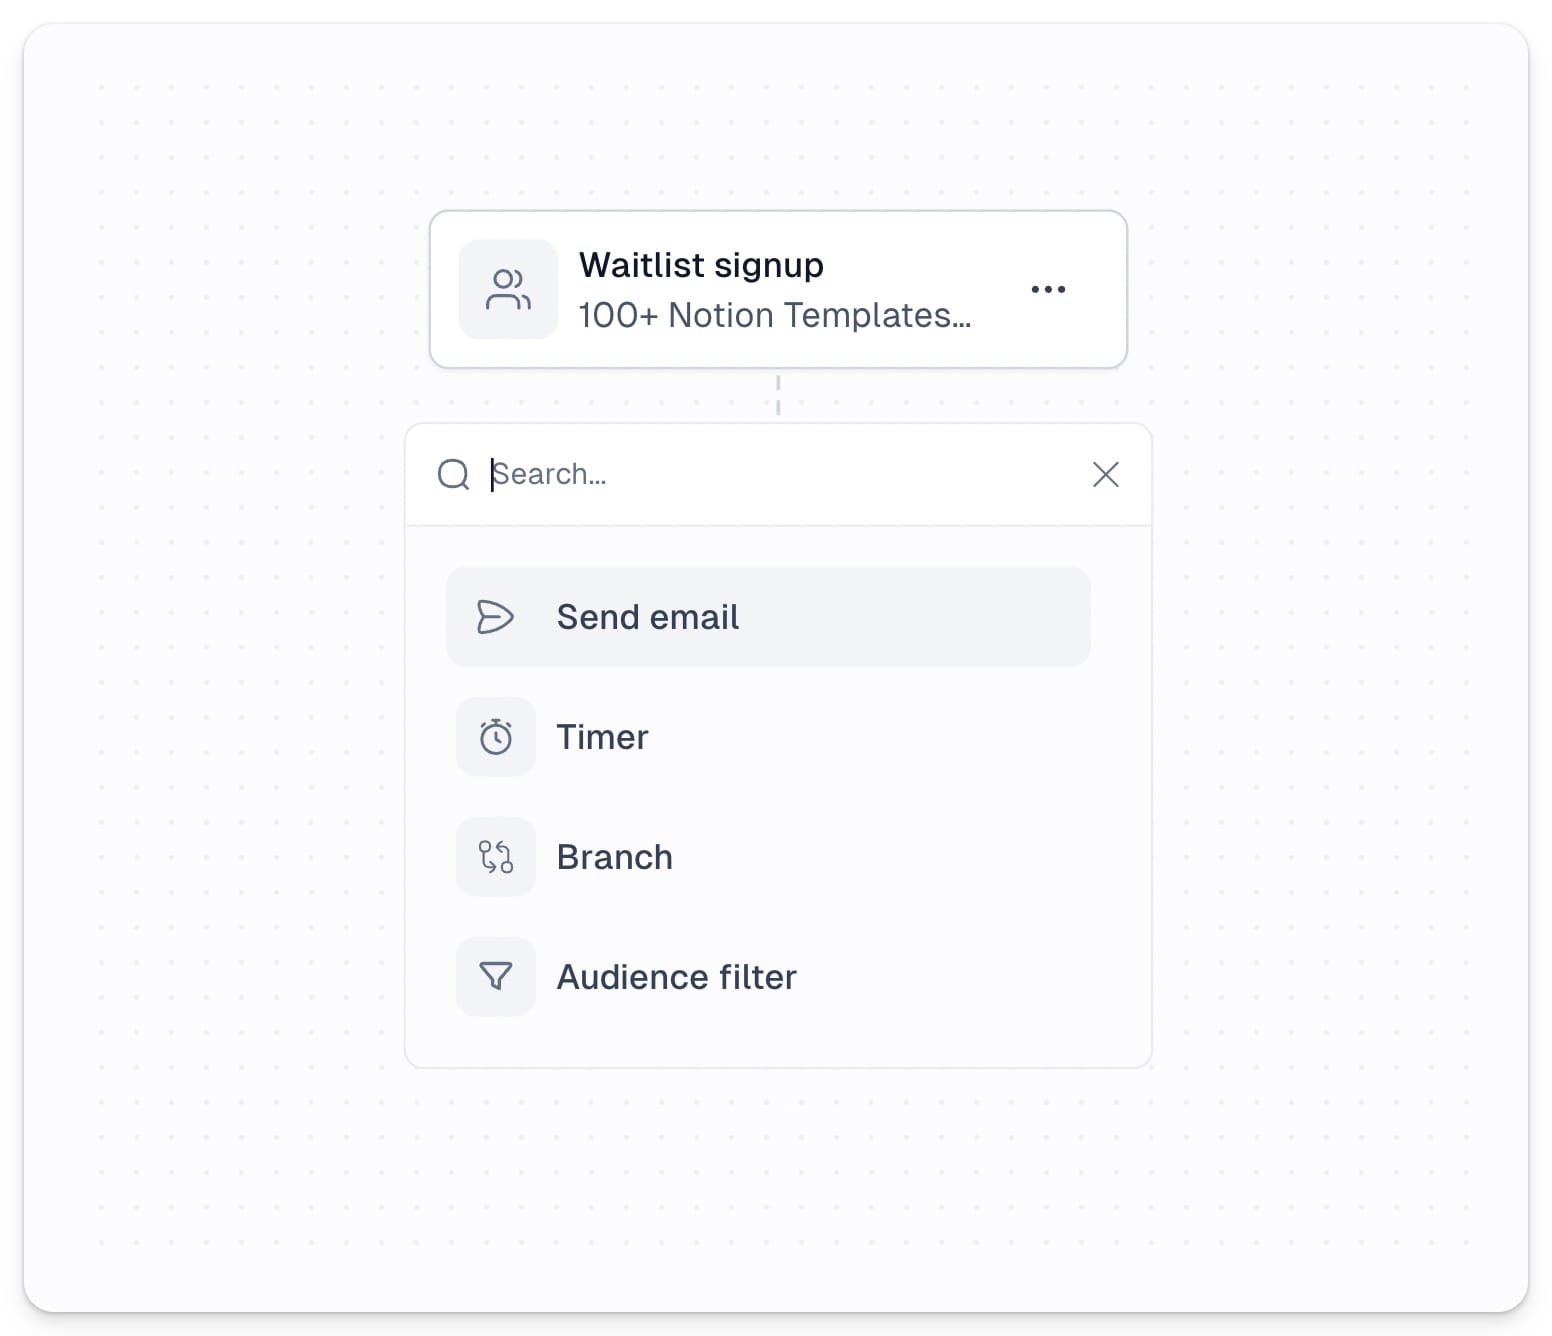
- Send email - send an email to your contacts at this point in the sequence
- Timer - add a delay before the next step kicks in
- Branch - split your workflow into different paths based on how contacts behave
- Audience filter - control which contacts move forward to the next step based on specific conditions
For more details on each action type check out the automation actions article.
Activating your workflow
Once your flow is ready, click Activate in the top right corner to launch it. From this point on, every contact who meets the trigger condition will be automatically enrolled in the sequence.
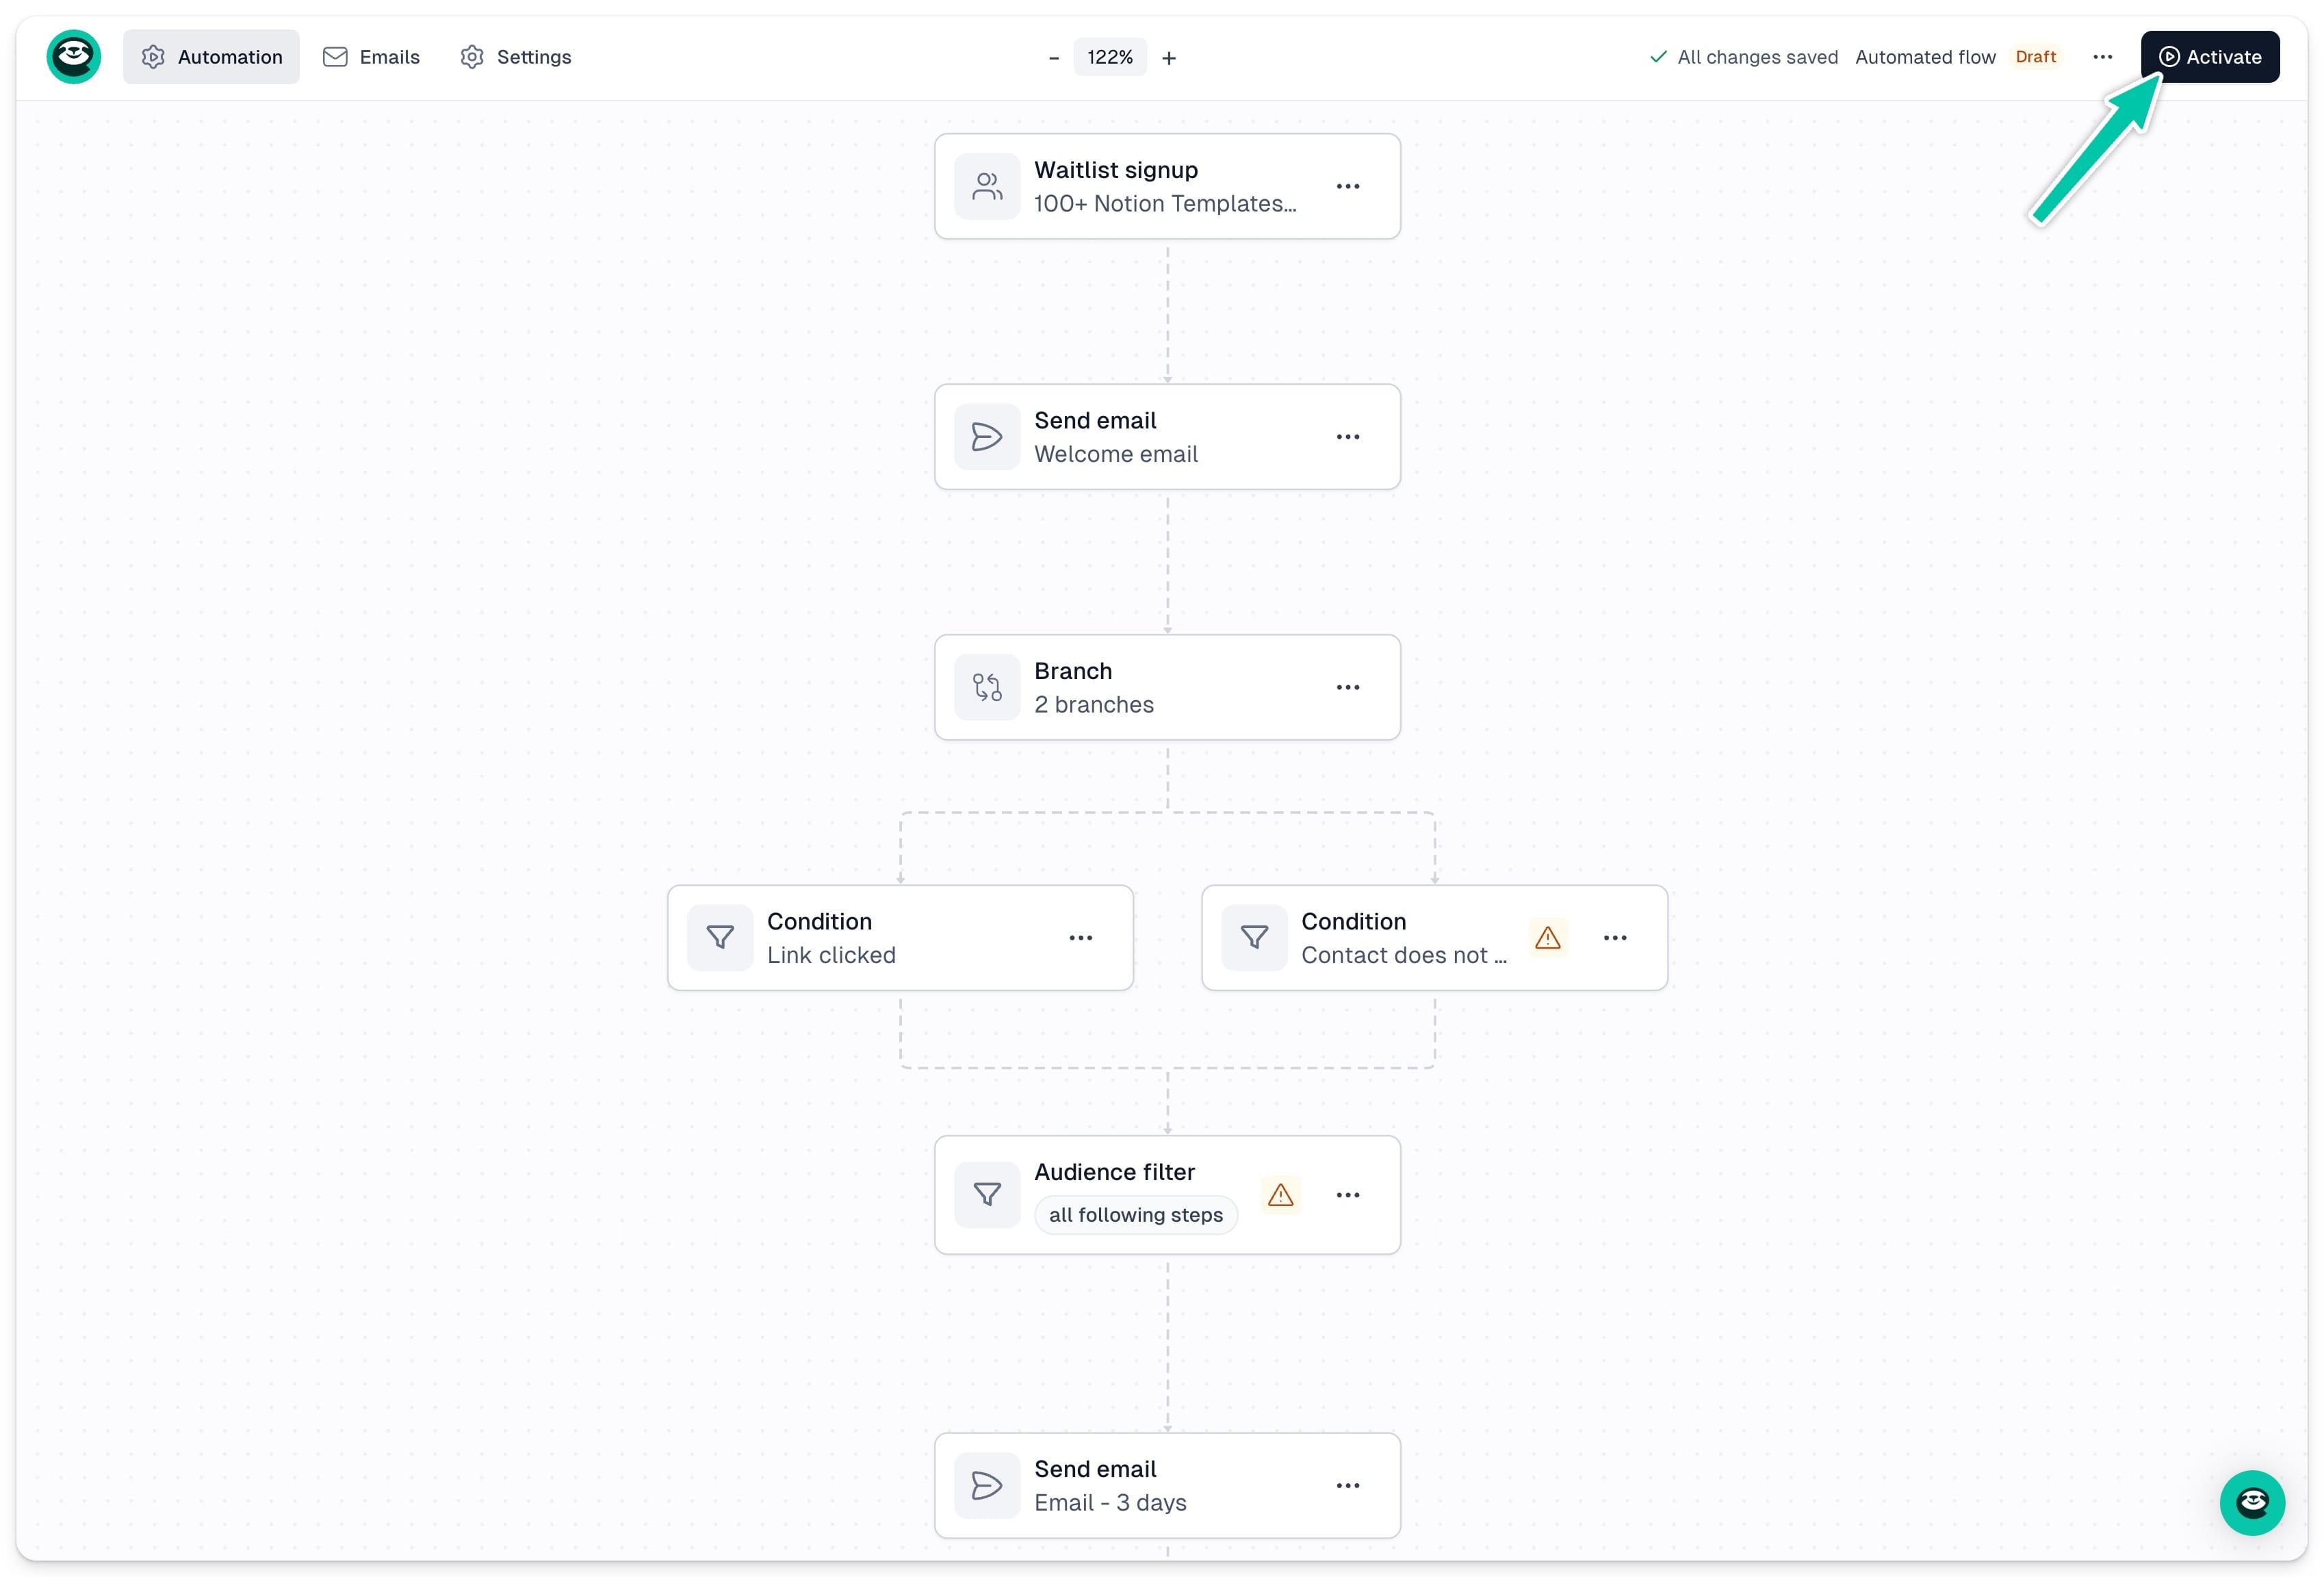
The workflow will also automatically switch to preview mode, where you can see how many contacts are at each step. Learn more about monitoring your automation results.
To make any changes to an active sequence, you will need to pause it first.